All Categories
Featured
Table of Contents
- – Rv Couch La Habra, CA
- – OCRV Center
- – Replacement Windows For Rv La Habra, CA
- – Replace Rv Flooring La Habra, CA
- – Rv Dinette Table La Habra, CA
- – Rv Replacement Awnings La Habra, CA
- – Rv Interior Furniture La Habra, CA
- – Rv Carpet Installation La Habra, CA
- – Rv Dinette Booth La Habra, CA
- – Rv Couch Bed La Habra, CA
- – Awnings For Trailers La Habra, CA
- – Replacement Rv Windows La Habra, CA
- – Replace Rv Flooring La Habra, CA
- – Rv Restoration Companies La Habra, CA
- – OCRV Center
Rv Couch La Habra, CA
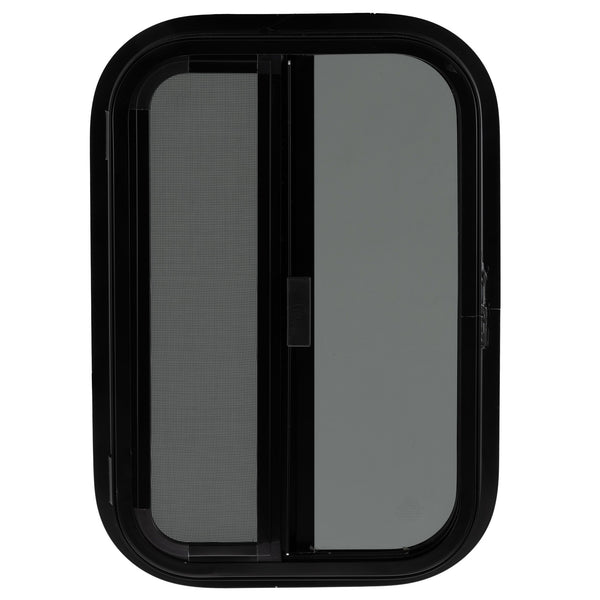
Other terms for this type of home window seal can be polishing or home window trim. Instance of fixed home window After you have actually confirmed your window kind, currently it's time to find the substitute seal.
This "image" is an extremely essential piece to the problem. The second piece of the challenge is knowing the measurements of your account (see what locations you require to gauge with the instance photos below). Furthermore, you'll need to have an approximate footage in mind so you understand how much to get.
When you're shopping online, remember that some producers only supply their seals at a minimum or pre-cut sizes. That will not function for every project. Make certain that the manufacturer you acquire from offers by the foot options so you have control of rate and length. Scraper/Tuck Device a terrific tool for getting rid of the old seal, and pressing the new seal in place Loctite Super Bonder 495 not essential, but will certainly include safety and security in edges if you have to make any changes Adhesive Eliminator the recreational vehicle producer might have used adhesive to apply the initial seal.
These chemicals can be dangerous otherwise made use of best If you do not have whatever on this checklist, we've got you covered! See our Devices & Adhesive area. Some may be available at your local auto parts keep as well. Begin by (meticulously) getting rid of the home window. Area the window on a sheet covered table to avoid damaging.
Replacement Windows For Rv La Habra, CA
Glue cleaner is particularly handy below. It will remove every little thing off the home window structure consisting of any kind of adhesive that may have been Clean the RV structure, or channel where the window sits. You will certainly desire a tidy surface for your brand-new seal As soon as whatever is clean, take your new seal and press into place.
Gaskets will certainly make an audible sound when they have broken into location. Something else to note: some installations may need you to get rid of the glass from the window structure.
Replace Rv Flooring La Habra, CA
After the glass is eliminated, the seal setup must be the very same as detailed above. If you have concerns regarding weatherstripping for your traditional car, road pole, MOTOR HOME, or boat, don't hesitate to contact us!
Recreational vehicle home window replacement is one of the most convenient do-it-yourself jobs. All you do is eliminate a few screws, stand out the old window out, use sealant, and pop the brand-new home window in. Obviously there are a few additional actions, which we'll get to in a moment, however that's the fundamental procedure.
You can choose a different home window kind if you like. Substitute alternatives include dealt with pane, gliding pane, jalousie, awning, frameless, and egress. If you desire much better insulation from the warm and the cool, you can upgrade from solitary pane to double pane home windows. There are also various shades and shades of tinting that can be put on the window.
Properly measuring the measurements of your old window, or your home window opening, is vital when ordering substitutes. Most camper home windows are custom made, and returns are usually not approved. Fixed pane/awning window combination by Kinro Most of RV home windows are clamp ring placed. That suggests the motor home sidewall is sandwiched between an exterior home window framework and an indoor trim ring.
Rv Dinette Table La Habra, CA
Stress holds the window in location. Mounting screws are on the within the home window, leaving a smooth appearance outside. Replacement RV home windows normally come packaged with indoor trim rings, screws, and putty tape, so no extra hardware is needed. Someone can change a home window, though it will certainly be bit simpler with two people, specifically if it's a huge home window.
If you're replacing all the home windows on your camper, you'll possibly slash off a few of that time after doing a couple. We're reader-supported. When you buy via links on our site, we may earn an affiliate commission. Philips Screwdriver Putty Knife, Scraper Tool, or Flat Head Screwdriver Silicone Sealant Spray Container of Water Leader or Tape Action Tape, if no assistant is readily available (blue painter's tape works best) The initial 3 steps involve getting rid of the old window and sealant From inside the RV, beginning by eliminating the drapes and blinds.
Rv Replacement Awnings La Habra, CA
Currently you'll eliminate the screws from the interior window trim ring. There will be 12 or even more screws below. Prior to removing the last couple of screws, you'll require an assistant to stand up the window outside to prevent it from falling to the ground. If no helper is readily available, tape can be use to stand up the window.
More than likely, the home window will still be kept in area by caulking and putty tape. Currently you'll move outside the recreational vehicle, and with a putty knife under the exterior window flange, carefully pry the home window out from the sidewall. It assists to have an additional person keep the window while you pry it out.
A clean surface will offer a far better hold for the new putty tape and caulking, and make a far better seal. Now it's time to pop in that glossy brand-new RV window and secure the bargain Dry fit the brand-new motor home window initially, to ensure it fits correctly. Do this by positioning the home window in the opening, without any type of putty tape.
Rv Interior Furniture La Habra, CA
If there is much less overlap on top, you'll require to use shims to increase the window up from the base. The window ought to be focused in the home window opening, both up and down and horizontally.
Apply the supplied putty tape to the recreational vehicle sidewall around the border of the home window opening. Excessive putty tape is better than too little. You don't desire any type of voids for water to slip in between the outside home window flange and the RV sidewall. Any extra will be ejected when the interior trim ring is screwed in position.
This will certainly protect against the window from sticking to the putty tape, giving you some time to focus the home window. Now set up the home window, focusing it in the window opening. As soon as back inside, install the indoor trim ring utilizing the supplied screws. Have your helper stand up the window on the outdoors, or make use of tape to hold it up.
Once the screws are tightened, go outside and check that there are no voids in the putty tape. For extra insurance versus water damages, apply a grain of clear silicone sealant around the window frame.
Rv Carpet Installation La Habra, CA
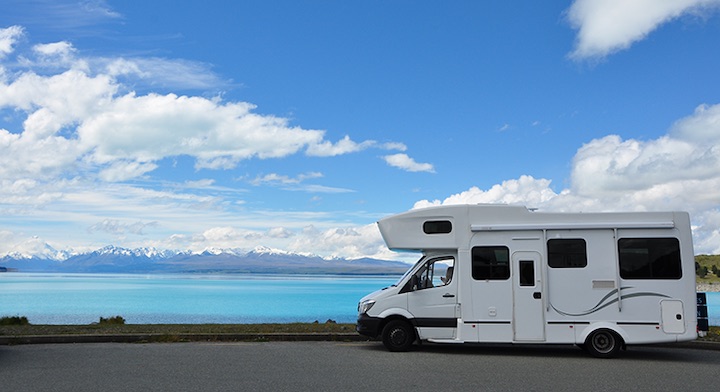
A motor home is component residence and part automobile, and occasionally, after the "home" has actually been driven for miles and miles over rough roadways, upkeep issues can occur. Amongst the possible repair work that a recreational vehicle owner might deal with is a recreational vehicle window substitute. We faced this problem a number of years earlier and satisfied it head-on with our desire to DIO (Do It Ourselves) as most of our very own motor home upkeep and fixing jobs as feasible.
These are the devices we needed for our camper window replacement. Depending on your Motor home, you might or might not need all of these devices for your task.
Despite where you purchase your new motor home window, you'll need to supply accurate dimensions. Allow's break down our procedure for measuring a motor home home window for substitute. Begin by getting rid of any kind of window frame, blinds, or tones. Next, remove all screws around the border of the home window, and eliminate the within structure.
Rv Dinette Booth La Habra, CA
Don't put any outside stress on the home window while taking your measurements or it might come loosened and loss. For additional security, you may desire to have an assistant on a ladder outside, holding the home window in position while you determine. Meticulously get rid of the structure of your old home window so that you can measure the opening (NOT the home window itself).
For our rectangle-shaped window, we required to take only 4 dimensions. Please keep in mind that we're determining the opening itself. Using a measuring tape, take mindful note of the size and elevation of the opening. It's an excellent idea to take measurements at a number of points so you have an idea of how cleanly the window opening was cut.
Rv Couch Bed La Habra, CA
Dimensions of the old window and the home window opening are commonly different. In fact, they can differ as long as half an inch on the sides, leading, and base. Home window manufacturers utilize filler strips to keep the window level and snug. This is why it's so important to measure the opening and not the initial window itself.
Procedure two times, cut when, right? Take your time to get an exact measurement, and ascertain it by gauging a second time. Exact measurements are necessary to motor home window substitute. We do not wish to loosely determine and assemble or down. Constantly gauge to the nearby 1/16th of an inch. Take a close check out your measuring tape and make certain you understand which are the 1/16th-inch dimensions.
Awnings For Trailers La Habra, CA
The home window manufacturers are the best authorities on installing their products. The supplier of your brand-new RV window has most likely included handy standards or ideas to make the installation much easier. These kinds of directions are often included on manufacturers' websites. If your brand-new home window included directions in the plan, make certain to keep those helpful as they might have detailed step-by-step directions in a consisted of booklet.
There might be a bead of sealer around the top of your old window or in between the external window frame and the motor home's sidewall. If so, you'll need to eliminate this before eliminating the old home window. Relocating to the beyond the RV, use your plastic putty knife (yes PLASTIC, to stay clear of scratching your RV's coating) to meticulously damage the seal around the old window and remove it.
Replacement Rv Windows La Habra, CA
Make certain the home window is OPEN so that you can securely grasp the window as it befalls of the opening, once the seal is broken. Remove any continuing to be sealer utilizing your plastic putty blade, and clean off any kind of remaining particles using mineral spirits. Offer the area a final cleansing using massaging alcohol to make sure that the area around the home window opening is devoid of any oily deposit.
Begin by setting your brand-new home window on a level surface covered with a soft fabric, with the exterior of the window facing down. Tidy all the means around the side with scrubing alcohol and a tidy cloth. This will make certain that the surface area is clear of all deposit. Utilizing the included roll of double-sided, closed-cell foam tape, apply the tape.
Replace Rv Flooring La Habra, CA
Measurements of the old window and the window opening are commonly various. Actually, they can vary as long as half an inch on the sides, top, and base. Window suppliers use filler strips to keep the window degree and snug. This is why it's so vital to determine the opening and not the initial window itself.
Measure two times, cut when, right? Take your time to get an exact dimension, and ascertain it by gauging a second time. Exact measurements are essential to recreational vehicle home window substitute. We don't wish to loosely measure and assemble or down. Constantly determine to the local 1/16th of an inch. Take a close check out your measuring tape and make certain you know which are the 1/16th-inch dimensions.
The home window makers are the very best authorities on installing their items. The supplier of your new recreational vehicle window has most likely included useful standards or pointers to make the installation easier. These types of instructions are usually included on suppliers' web sites. If your new window featured instructions in the bundle, make certain to keep those helpful as they may have outlined step-by-step directions in an included brochure.
Rv Restoration Companies La Habra, CA
There may be a grain of sealer around the top of your old home window or in between the external window structure and the recreational vehicle's sidewall. If so, you'll need to eliminate this before removing the old home window. Relocating to the beyond the recreational vehicle, use your plastic putty knife (yes PLASTIC, to stay clear of scraping your recreational vehicle's surface) to thoroughly break the seal around the old window and eliminate it.
Make certain the home window is OPEN to ensure that you can securely understand the window as it drops out of the opening, once the seal is damaged. Remove any continuing to be sealer using your plastic putty blade, and wipe any type of staying debris using mineral spirits. Offer the location a final cleansing using massaging alcohol to make certain that the area around the window opening is cost-free of any oily deposit.
OCRV Center
Address: 23281 La Palma Ave Yorba Linda, CA 92887Phone: (714) 909-1444
Email: [email protected]
OCRV Center
Begin by setting your brand-new window on a flat surface covered with a soft fabric, with the outside of the window facing down. Clean right around the edge with massaging alcohol and a tidy cloth. This will guarantee that the surface area is clear of all deposit. Making use of the included roll of double-sided, closed-cell foam tape, apply the tape.
Rv Couch La Habra, CAReplacement Rv Refrigerator La Habra, CA
Replace Rv Flooring La Habra, CA
Rv Sofa Sleeper La Habra, CA
Rv Carpet Installation La Habra, CA
Rv Couch La Habra, CA
Replacement Rv Windows La Habra, CA
Replacement Rv Refrigerator La Habra, CA
Rv Dinette Booth La Habra, CA
Rv Replacement Awnings La Habra, CA
Awnings For Trailers La Habra, CA
Rv Replacement Furniture La Habra, CA
Rv Replacement Furniture La Habra, CA
Rv Upholstery La Habra, CA
Replacement Rv Refrigerator La Habra, CA
Rv Carpet Replacement La Habra, CA
Rv Carpet Replacement La Habra, CA
Rv Restoration Companies La Habra, CA
Awnings For Trailers La Habra, CA
Rv Floor Replacement La Habra, CA
Rv Replacement Furniture La Habra, CA
Awnings For Trailers La Habra, CA
Rv Chairs La Habra, CA
Rv Carpet Replacement La Habra, CA
Motorhome Carpets La Habra, CA
Replace Rv Flooring La Habra, CA
Rv Microwave Replacement La Habra, CA
Rv Refrigerator Replacement La Habra, CA
Rv Chairs La Habra, CA
Awnings For Rv La Habra, CA
Awnings For Trailers La Habra, CA
Rv Floor Replacement La Habra, CA
Awnings For Trailers La Habra, CA
Rv Dining Table La Habra, CA
Replacement Rv Refrigerator La Habra, CA
Rv Interior Remodel La Habra, CA
Rv Sofa Sleeper La Habra, CA
Rv Sofa Sleeper La Habra, CA
Rv Sofa Beds La Habra, CA
Rv Replacement Furniture La Habra, CA
Rv Dining Table La Habra, CA
Rv Upholstery La Habra, CA
Rv Microwave Replacement La Habra, CA
Rv Floor Replacement La Habra, CA
Awning Installation La Habra, CA
Replace Rv Flooring La Habra, CA
Rv Floor Replacement La Habra, CA
Awning Installation La Habra, CA
Replace Rv Flooring La Habra, CA
Rv Carpet Replacement La Habra, CA
Replace Rv Flooring La Habra, CA
Rv Sofa Sleeper La Habra, CA
Rv Couch Bed La Habra, CA
Remodeling Rv La Habra, CA
Rv Carpet Installation La Habra, CA
Awnings For Rv La Habra, CA
Rv Sofa Beds La Habra, CA
Rv Sofa Sleeper La Habra, CA
Rv Replacement Furniture La Habra, CA
Rv Sofa Sleeper La Habra, CA
Rv Interior Remodel La Habra, CA
Rv Microwave Replacement La Habra, CA
Rv Upholstery La Habra, CA
Rv Replacement Furniture La Habra, CA
Awnings For Trailers La Habra, CA
Rv Dinette Table La Habra, CA
Replacement Windows For Campers La Habra, CA
Rv Upholstery La Habra, CA
Replacement Windows For Rv La Habra, CA
Replacement Rv Refrigerator La Habra, CA
Replacement Windows For Campers La Habra, CA
Rv Dining Table La Habra, CA
Replacement Rv Refrigerator La Habra, CA
Rv Couch Bed La Habra, CA
Awning Installation La Habra, CA
Replace Rv Flooring La Habra, CA
Rv Replacement Awnings La Habra, CA
Rv Replacement Awnings La Habra, CA
In Seo Citations La Habra, CA
Near Me Seo Marketing Agency La Habra, CA
OCRV Center
Table of Contents
- – Rv Couch La Habra, CA
- – OCRV Center
- – Replacement Windows For Rv La Habra, CA
- – Replace Rv Flooring La Habra, CA
- – Rv Dinette Table La Habra, CA
- – Rv Replacement Awnings La Habra, CA
- – Rv Interior Furniture La Habra, CA
- – Rv Carpet Installation La Habra, CA
- – Rv Dinette Booth La Habra, CA
- – Rv Couch Bed La Habra, CA
- – Awnings For Trailers La Habra, CA
- – Replacement Rv Windows La Habra, CA
- – Replace Rv Flooring La Habra, CA
- – Rv Restoration Companies La Habra, CA
- – OCRV Center
Latest Posts
Rv Paint Job Mira Loma
Rv Wall Repair Diamond Bar
Health Insurance Plans For Students Rancho Santa Margarita
More
Latest Posts
Rv Paint Job Mira Loma
Rv Wall Repair Diamond Bar
Health Insurance Plans For Students Rancho Santa Margarita