All Categories
Featured
Table of Contents
- – Awnings For Rv Irvine, CA
- – OCRV Center
- – Remodeling Rv Irvine, CA
- – Rv Interior Remodel Irvine, CA
- – Rv Sofa Beds Irvine, CA
- – Rv Restoration Companies Irvine, CA
- – Rv Chairs Irvine, CA
- – Rv Replacement Furniture Irvine, CA
- – Replacement Windows For Rv Irvine, CA
- – Rv Dinette Booth Irvine, CA
- – Replacement Rv Windows Irvine, CA
- – Rv Chairs Irvine, CA
- – OCRV Center
Awnings For Rv Irvine, CA
Thankfully, with a sleeper sofa you don't have to select between a confined space, sitting on the bed or resting on the couch.
The huge bargain regarding domestic vs. "recreational vehicle brand names" (like Lambright) is getting points apart to bring them in the door. Many property couches do not come apart and, if they have arms or are longer than the door is tall, it can be beside difficult to get them in the door.
Today I desire to cover some of the most crucial facets to consider when DIY a restoration for a sofa couch and likewise some of our preferred options (and the ones we thought about when remodeling our own Camper) Replacing with a Replacing with a totally for the current sofa I will go over every one of them and some important point to consider when choosing what route to go.
But there are several factors to consider to have in mind when thinking about going this path:: As we discuss in this article that covers 5 things we discovered during our remodel. Prior to including anything to your RV, ensure that the sofa you will certainly utilize weight the same or much less than the one you are taking away.: Most residential sofas will certainly need to either be bolted to a surface area or be momentarily safeguarded somehow while in transportation.
Remodeling Rv Irvine, CA
While Kaylie's couch from @bloomingoaksfarm is not a sleeper sofa, I was able to find a couple that resembles the style that is certainly a couch bed. Those would be so best for a motor home with a small room. Actions 55 x 38 x 38 inches and includes bi-fold double size memory foam mattress.
This twin couch measurements are 54 x 32.5 x 35.5 inches and the bed mattress dimensions are 72 x 37 x 3 inches. It appears like what Shelvy from @shelbyadrift did is usage two different sofa chairs together, however I simply like the look of the natural leather in contrast with the remainder of the room.
This modern-day brownish futon procedures 70 x 34.5 x 31 inches. This living-room by Karlee from @karleemmarsh is such a motivation, I enjoy the play in structures and the contrast of the accent wall surface. Her sofa is a pull-out however Light grey couch bed, measures 72.5 x 43.3 x 15 inches This dark grey sleeper bed actions 89 x 33.8 x 33.8 inches.
Rv Interior Remodel Irvine, CA
While this option of natural leather sofas, they are vast enough that can be utilized to rest on them. This attractive tufted mid-century leather couch measures 86.6 x 36.2 x 30.3 inches.
Seeking more ideas for tiny sofas? Examine all these various other choices below: Of training course, if changing your recreational vehicle couch with another newer model is what you have in mind there are a number of options like the ones listed below in various shades and sizes that will benefit a lot of RVs.: For the a lot of component replacing it would certainly be pretty easy, they would certainly be bolted to the ground so there's no threat of it relocating while in transit.: The selection of styles is extremely minimal, in addition to the offering of fabrics and shades.
One more alternative that could need some kills in the building division is to venture into making your own sofa. I have only seen one couple do this (Katie and Eric from) and I am so happy they made a complete article explaining every action!
Rv Sofa Beds Irvine, CA
Here you can see that we went with a black hair for our sofa and I selected a grey water-proof material for the slipcovers of the seats in the kitchenette, I enjoy just how very easy to clean they are, plus making them was not hard. Irvine Rv Dining Table. I will certainly share a complete tutorial of just how I made our covers quickly however in the meantime, I desired to share the amazing task that Allie from made on the covers for her sofa
Save this message for later making use of the pins listed below.
This is in part as a result of the selection of floorplans and the method RVs are crafted to make the very best use space. Consequently, points like RV dinettes and sofa bed may have varied sizes which conventional cushions could not fit or keep quickly. You can take a look at our RV cushions up for sale at our RV furniture store in individual or online.
At Bradd and Hall, we carry the best motor home furniture for sale, including a variety of seating options. We offer motor home sofas, reclining chairs, cinema seating, captain's chairs and even more! You can buy our furniture online and at our recreational vehicle furnishings shop in Elkhart, Indiana. We also drape our recreational vehicle seating with the finest materials like Ultraleather which ins 2015 without fading or splitting.
Rv Restoration Companies Irvine, CA
Our premium RV Sleeper Sofas, Tri-fold Couch Beds, and Recreational Vehicle Jacknife Beds are designed with quality, comfort and value in mind. Our extensive line of product is built around: Lambright RV Furnishings and Suite recreational vehicle Furnishings (custom-made), the sector's leading RV Furnishings makers. For over 40 years we have taken an individual passion in fitting the consumer to the furnishings, and the RV furnishings to the train and its intricacies.
I can almost establish my watch by my motor home sofas, since precisely 3 years right into their lives the joints begin to burst and the sofas need to be replaced. It's that time again for us, yet I'm not so sure I wish to simply get the exact same old things again.
Our setup has 2 slides and we have actually obtained couches on both sides. One side has a double couch that folds out right into a queen sleeper. The opposite side has seating for four: 2 reclining couches, a facility console with cupholders and a great place to shed your phone/keys/wallet, and after that two more reclining sofa seats.
I do not desire to lose any seats however, because we typically have more people than seats as it is. Ideas?.
Rv Chairs Irvine, CA
Bradd & Hall provides an extensive option of motor home sofas available for sale that will certainly fit perfectly in your Motorhome, Traveling Trailer, Fifth Wheel, or Destination Trailer. Our motor home sofas consists of brands like Lambright and Villa. Whether you require a motor home sofa bed or motor home jackknife sofa, we lug a variety of designs that range in dimension and attributes.
The larger variations consist of facility gaming consoles with mug holders and storage space. These recreational vehicle recliners hold true wall huggers that just need three inches of clearance. They provide the maximum convenience, capability, and storage space for a couch recliner chair. Lambright RV Recliners & Cinema Seating are constructed with 2 or 3 unique seats and options included or without facility consoles.
Rv Replacement Furniture Irvine, CA
The normal-sized sofa will certainly occupy a corner of area, nevertheless, the extra seats is helpful when taking a trip with extra visitors. The broadened seating is convenient however features the expense of walking floorspace. Suite Dormie Sofas can be transformed into a level area to put an air bed mattress on top.
The Suite J Lounges put a special spin on the conventional sofa and separates into 2 different pieces for less complicated installation. Rental Property Custom-made Set" Need customized Motor home furniture or streamlined watercraft furniture?
Replacement Windows For Rv Irvine, CA
Flexsteel Motor Home Sleepers Sofas Sofas feature as a sofa and after that a bed through a pull-out bed mattress. The bed will certainly require 86 from the wall surface to completely open up and many have alternatives for flat floorings and raised floor slide outs. Flexsteel FT Sofas converts into a put down bed, just like the jackknife couch, however provides the included benefit of a full-sized bed in an overall smaller sized size.
You can even custom-made order these motor home sofa bed in your option of shade. One location to buy a customized recreational vehicle sofa bed with storage is You can see a few of the recreational vehicle sofas with storage they offer here. The rate of recreational vehicle furniture can be quite frankly shocking, specifically taking into consideration just how RV sofas are usually uneasy to rest on That's why most motor home owners choose to replace our uncomfortable, outdated RV furniture with household furniture.
In this write-up, I'll share couches in various dimensions and styles I've discovered to buy online that include hidden storage areas, making them perfect to place in a motor home. Yet initially, I want to deal with a couple of worries people typically raise at the reference of utilizing property furniture inside a RV.
It is vital to be conscious of staying within your motor home's freight weight restriction, in addition to not dramatically altering the original weight circulation, so I have actually listed the weight of each sofa mentioned in this short article where possible. 64 inches 114.2 poundsDark Gray or Off White If you're looking for a substitute RV couch with storage that's less costly and extra comfy than basic motor home furniture this tiny sofa with concealed storage would make a terrific option.
Rv Dinette Booth Irvine, CA
This specific couch has numerous choices to choose from for the cushion/mattress color. 86 inches 192 poundsLight Gray or Dark Gray This couch is definitely on the bigger dimension for a Motor home couch, but if you have a lengthy slide it may fit.
Not just is there storage room under the seats and chaise, it transforms to a full-sized bed big sufficient for an averaged-size grownup. Browse various other sofa bed similar stylishly to this one on Amazon. 81.1 inches Not detailed Skies blue or light grey (various other designs & colors readily available as well) The web site offers great deals of really intriguing, modern couches like the one shown above that layer out to a bed that will conveniently sleep two adults and feature a storage compartment too.
Replacement Rv Windows Irvine, CA
78.2 inches90 extra pounds (without bed mattress) This daybed out to increase the bed size, making it a king-sized bed. This would be terrific for a full-time RVing family with parents who sleep in the living space. The bed mattress for this bed would certainly require to be purchased individually.
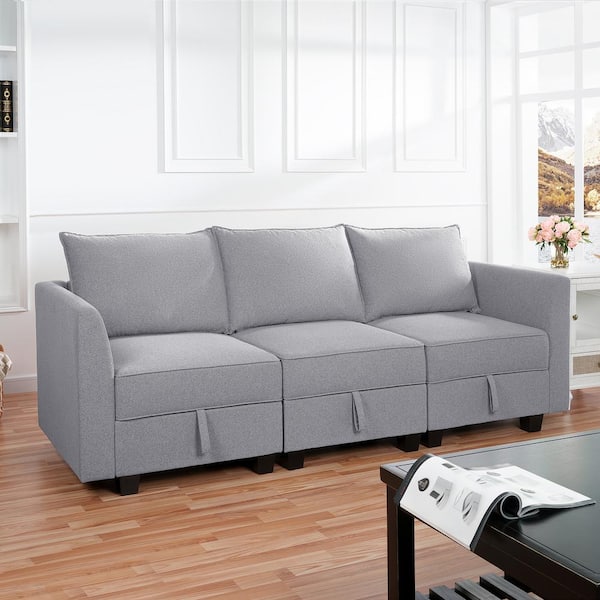
There are a few good choices! Product currently sold out. 57 for the loveseat, 85 for the 3-seat sofaNot detailed customer claimed it was "light-weight"Gray, Dark Gray, or Light Off-white Flexible Modular Style: Tailor your home with this exchangeable modular sectional sofa. Prepare it to fit any type of area format, producing a relaxing couch bed, L-shaped or U-shaped sofa to match your design.
It is vital to be conscious of staying within your RV's cargo weight limit, in addition to not significantly changing the original weight circulation, so I've noted the weight of each sofa mentioned in this post where possible. 64 inches 114.2 poundsDark Gray or Off White If you're looking for a replacement motor home sofa with storage that's more affordable and much more comfortable than basic motor home furniture this tiny sofa with hidden storage space would make a terrific option.
Rv Chairs Irvine, CA
This certain couch has a number of choices to pick from for the cushion/mattress color. If you choose a various shade of timber there are great deals of sofas comparable to this one offered online. 86 inches 192 poundsLight Gray or Dark Gray This couch is certainly on the bigger dimension for a recreational vehicle couch, however if you have a long slide it may fit.
Not just exists storage room under the seats and chaise, it converts to a full-sized bed big enough for an averaged-size grownup. Surf other sofa bed similar in vogue to this set on Amazon. 81.1 inches Not provided Skies blue or light gray (various other styles & colors offered also) The web site offers whole lots of actually fascinating, contemporary couches like the one shown above That layer out to a bed that will conveniently rest 2 grownups and feature a storage area.
78.2 inches90 extra pounds (without bed mattress) This daybed out to increase the bed width, making it a king-sized bed. This would certainly be fantastic for a full-time RVing household with moms and dads that sleep in the living area. The mattresses for this bed would need to be acquired separately.

OCRV Center
Address: 23281 La Palma Ave Yorba Linda, CA 92887Phone: (714) 909-1444
Email: [email protected]
OCRV Center
There are a couple of good choices! Product currently sold out. 57 for the seat, 85 for the 3-seat sofaNot provided customer claimed it was "lightweight"Gray, Dark Gray, or Light Off-white Flexible Modular Design: Tailor your home with this convertible modular sectional sofa. Arrange it to fit any room design, producing a relaxing sofa bed, L-shaped or U-shaped sofa to match your decoration.
Rv Floor Replacement Irvine, CARv Sofa Sleeper Irvine, CA
Rv Couch Irvine, CA
Rv Refrigerator Replacement Irvine, CA
Replace Rv Flooring Irvine, CA
Awnings For Rv Irvine, CA
Rv Floor Replacement Irvine, CA
Replacement Windows For Rv Irvine, CA
Rv Floor Replacement Irvine, CA
Rv Sofas Irvine, CA
Replace Rv Flooring Irvine, CA
Rv Interior Remodel Irvine, CA
Rv Couch Irvine, CA
Rv Interior Furniture Irvine, CA
Rv Interior Remodel Irvine, CA
Rv Floor Replacement Irvine, CA
Awnings For Rv Irvine, CA
Rv Interior Furniture Irvine, CA
Rv Interior Remodel Irvine, CA
Replacement Rv Windows Irvine, CA
Rv Refrigerator Replacement Irvine, CA
Rv Couch Irvine, CA
Rv Carpet Installation Irvine, CA
Replace Rv Flooring Irvine, CA
Rv Couch Irvine, CA
Awnings For Rv Irvine, CA
Rv Dinette Booth Irvine, CA
Rv Carpet Installation Irvine, CA
Replace Rv Flooring Irvine, CA
Rv Couch Bed Irvine, CA
Rv Microwave Replacement Irvine, CA
Rv Carpet Installation Irvine, CA
Replacement Rv Refrigerator Irvine, CA
Rv Sofa Beds Irvine, CA
Rv Carpet Replacement Irvine, CA
Rv Interior Furniture Irvine, CA
Rv Sofa Beds Irvine, CA
Rv Upholstery Irvine, CA
Rv Dinette Booth Irvine, CA
Rv Sofa Sleeper Irvine, CA
Rv Sofa Beds Irvine, CA
Replacement Rv Refrigerator Irvine, CA
Rv Floor Replacement Irvine, CA
Awnings For Rv Irvine, CA
Rv Floor Replacement Irvine, CA
Rv Sofa Beds Irvine, CA
Rv Upholstery Irvine, CA
Remodeling Rv Irvine, CA
Replace Rv Flooring Irvine, CA
Rv Carpet Replacement Irvine, CA
Motorhome Carpets Irvine, CA
Remodeling Rv Irvine, CA
Rv Restoration Companies Irvine, CA
Rv Carpet Installation Irvine, CA
Motorhome Carpets Irvine, CA
Rv Interior Remodel Irvine, CA
Rv Carpet Installation Irvine, CA
Rv Interior Remodel Irvine, CA
Rv Upholstery Irvine, CA
Rv Upholstery Irvine, CA
Awnings For Trailers Irvine, CA
Remodeling Rv Irvine, CA
Rv Interior Remodel Irvine, CA
Rv Dinette Booth Irvine, CA
Rv Couch Bed Irvine, CA
Remodeling Rv Irvine, CA
Rv Replacement Furniture Irvine, CA
Rv Dinette Booth Irvine, CA
Rv Couch Irvine, CA
Rv Interior Furniture Irvine, CA
Replacement Rv Windows Irvine, CA
Rv Interior Furniture Irvine, CA
Rv Sofa Beds Irvine, CA
Rv Interior Furniture Irvine, CA
Rv Refrigerator Replacement Irvine, CA
Rv Replacement Furniture Irvine, CA
Replacement Rv Windows Irvine, CA
Rv Replacement Furniture Irvine, CA
Near Me Seo Plans Irvine, CA
Close To Me Seo Optimization Irvine, CA
OCRV Center
Table of Contents
- – Awnings For Rv Irvine, CA
- – OCRV Center
- – Remodeling Rv Irvine, CA
- – Rv Interior Remodel Irvine, CA
- – Rv Sofa Beds Irvine, CA
- – Rv Restoration Companies Irvine, CA
- – Rv Chairs Irvine, CA
- – Rv Replacement Furniture Irvine, CA
- – Replacement Windows For Rv Irvine, CA
- – Rv Dinette Booth Irvine, CA
- – Replacement Rv Windows Irvine, CA
- – Rv Chairs Irvine, CA
- – OCRV Center
Latest Posts
Rv Paint Job Mira Loma
Rv Wall Repair Diamond Bar
Health Insurance Plans For Students Rancho Santa Margarita
More
Latest Posts
Rv Paint Job Mira Loma
Rv Wall Repair Diamond Bar
Health Insurance Plans For Students Rancho Santa Margarita