All Categories
Featured
Table of Contents
- – Sprinkler System Installation West Covina, CA
- – Pacific Green Landscape Maintenance
- – Irrigation Maintenance West Covina, CA
- – Residential Irrigation Repair West Covina, CA
- – Irrigation Installers West Covina, CA
- – Irrigation System Installers West Covina, CA
- – Residential Irrigation Repair West Covina, CA
- – Irrigation Installer West Covina, CA
- – Lawn Sprinkler Companies West Covina, CA
- – Irrigation System Installers West Covina, CA
- – Lawn Sprinkler Installers West Covina, CA
- – Irrigation Installer West Covina, CA
- – Pacific Green Landscape Maintenance
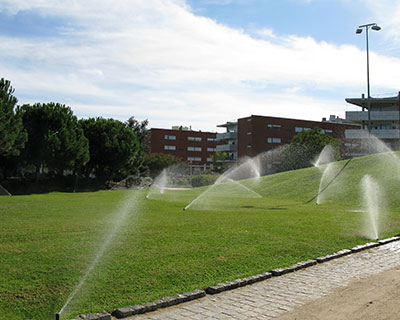
Sprinkler System Installation West Covina, CA
Pacific Green Landscape Maintenance
6530 Whittier Ave Whittier, CA 90601-3919(562) 203-3567
Pacific Green Landscape Maintenance
The best method to obtain started is with consistent watering and even protection across your landscapes. To shield your landscape watering system throughout extreme Ohio wintertimes, we recommend blowing out watering systems in the autumn to remove many of the water. In the spring when temperature levels stay above cold, check and restart the systems.
Irrigation Maintenance West Covina, CA
Whether you require a drip system for your garden beds or a full lawn sprinkler setup, we have actually obtained you covered (Irrigation Installer West Covina). Our watering systems are made to minimize water waste, making sure that each zone gets the optimal quantity of water and ensures complete protection. Our skilled team ensures your system is mounted properly, avoiding leakages, overwatering, or missed out on zones
Allow us assist you develop a water-efficient remedy that will certainly maintain your landscape thriving for years to come.
Residential Irrigation Repair West Covina, CA
We take pride in saying what we will do, and afterwards in fact doing what we stated. We might not be excellent every solitary time, we always do it right or make it. You will see in our testimonials that we stand by our items, our services and our job.
As Colorado begins to head right into what'll undoubtedly be an additional hot, completely dry summertime, irrigation solutions are choosing back up. As everybody turns the sprinklers back on for the year, expert watering solutions will certainly see to it that your residential or commercial property is dealt with. From spring start-ups, to leak fixings, to brand-new irrigation system installation, experienced irrigation specialists will have the ability to obtain one of the most out of your sprinklers while saving as much water as feasible.
have a number of ingenious attributes that help maximize water use efficiency such as weather monitoring, rain sensors, and intuitive apps that permit you to control whatever from another location. Some are also able to close themselves off and send out alerts if leakages or other issues are spotted - Irrigation Installer West Covina. Routine inspections and upkeep are the very best means to maintain your watering system going for peak performance all summertime long

Routine inspections and maintenance will help identify problems before they leave hand leakages, stopped up sprinkler heads, and origins are all usual watering system repairs. Watering system controllers are essentially clocks that control when to turn the sprinklers on and for how long they remain on. Whether running an open loop or closed loophole system, correct arrangement will certainly keep every little thing running efficiently.
Irrigation Installers West Covina, CA
are typically set manually using a clock, or a set quantity of water is input to control the length of time the sprinklers run. Occasionally these can both be combined i.e. setting a specific time to start the sprinklers, and establishing the system to stop when a certain amount of water has actually been used.
(i.e. smart systems) deal with operation on their own. Different sensing units measure specifications consisting of dirt wetness, loved one moisture, temperature level, and also the weather forecast. They send this information to the controller, allowing it to make a decision when to transform the water on and for the length of time. Shut loophole systems are a lot more costly than open loophole systems, however the cost savings on your water expense will generally balance out that expense in the lengthy run.
As quickly as winter begins to embed in, it's time to. Irrigation Installer West Covina. Icy water can quickly harm pipes, lawn sprinkler heads, shutoffs, and other components, which can be expensive to repair come springtime. It is essential to make sure that timers or controllers are shut off, that all water has actually been drained/blown out of the system, which all above-ground elements are correctly insulated
It is necessary that you extensively inspect the system throughout the startup process to examine for any kind of damaged parts or other concerns. Equipment needs to be restarted thoroughly to ensure that abrupt water pressure changes do not damage elements either. Water is the most important source for your business landscape. With Colorado in the middle of historic dry spell conditions, it's important that water is applied equally to all areas of your building and that water is preserved as long as possible.
Irrigation System Installers West Covina, CA
Offer your grass and plants the right quantity of water every single time with among our high-tech and dependable irrigation systems. We will certainly develop and install your irrigation system to fit your residential property's demands so that you don't need to take out the lawn sprinkler ever before once again! If your home currently has a watering system, our staff can also execute repairs, winterization, and startup solutions for your system.
Every building is various and will certainly need a tailored system to get the most effective results for your lawn and landscape. Among our system options is drip irrigation, which will certainly provide water straight to your plant's root zone. In turn, this will certainly prevent drainage and it will certainly save you cash down the line.
This is why our group uses a winterizing solution for your irrigation system. Utilize a commercial air compressor to blow all of the water out of your waterline, pipelines, shutoffs, and sprinkler heads.
When spring returns, it will be time to reboot your irrigation system and prepare it for the cozy weather condition ahead. It is very important to have an expert group like ours restart your watering system due to the fact that we have trained eyes that will certainly determine any type of broken parts. Our crew will make certain that everything is working smoothly to ensure that you get optimum water protection entering into the expanding season.
Residential Irrigation Repair West Covina, CA
Northeast Landscape Specialists will custom-made develop an irrigation system to meet your residential property's details landscape demands. We will certainly take into consideration, water stress and gallons per min, along with plants and planting product. Spring start-up. (We will run with your entire system to make certain whatever is in correct working order.)Winterization.
There have actually been several developments in sprinkler systems over the last 10 years. New styles of lawn sprinklers and new nozzles offer a more even circulation of water over your whole yard.
A rainfall sensor is one more low-cost way to conserve money, preserve water, and water your grass more effectively. If you have a hand-operated system, this is a great time to include a timer and to quit being a servant to your grass. As your landscape develops, bushes over grow the planting beds, and brand-new blockages are added to your backyard, such as; sheds, outdoor patios, decks and decorative wall surfaces.
Northeast Landscape Professionals will be there to advise you of the proper adjustments and to complete the job in a prompt manor. Timers installed, changed and replacedBroken lines repairedBroken lawn sprinkler heads replacedClogged heads cleaned up and adjustedZone valves replaced or rebuiltLow voltage cable replacedOutdated systems updatedBackflow preventers mounted, fixed or replacedDrip systems fixed or replacedCheck all areas for appropriate coverage Get in touch with Northeast Landscape Service Providers for all your watering solution requirements.
Irrigation Installer West Covina, CA
Yard and landscape design irrigation is a prominent, and sometimes called for, enhancement to homes and organizations. To accomplish healthy and rich lawns and landscapes, they have to be sprinkled on a regular basis on a regular schedule. Our customers in the Jackson, MS area, including surrounding areas like Brandon and Flowood, typically do not have the moment or need to establish up a hands-on lawn sprinkler to sprinkle their grass and plants.
Guaranteeing that your grass and landscape design is sprinkled on a consistent timetable will certainly advertise the healthy growth that house owners and company owner need. If you're not obtaining sufficient water stress, have actually broken sprinkler heads, zones that aren't functioning or any various other issue with your lawn sprinkler system, simply give us a call at ( 601) 829-1309 and we'll obtain it in working order.
The most vital variable when designing a brand-new irrigation system is the size of the whole building, then the shape of the residential or commercial property. Additionally the kinds of plants, trees, hedges and blossom you have in your landscaping can also affect the layout of your new irrigation system. Below are several of the different sorts of watering system elements that we generally install: are used to cover to a 15 foot span or more.
Lawn Sprinkler Companies West Covina, CA
The greatest advantage to an appear irrigation system is the look, or absence thereof. This system is buried under ground and is seen just when in operation. are really similar to the pop-up sprayer, yet they have a strong stream that rotates and are made use of to cover a larger area.
Trickle watering works by trickling water down toward the plant's origins. This type of watering need to be put near the plant due to the fact that there isn't any type of spray.
Irrigation System Installers West Covina, CA
Soaker irrigation (or soaker pipes) are hidden in your landscape beds and routed between your plants, after that connecting to your standard faucet. When turned on, water will stick out through the millions of tiny openings throughout the hose pipe, soaking the ground where your plant's roots grow. When you work with Atmosphere Landscape for your brand-new landscaping layout and setup, we always recommend an irrigation system if your don't have one currently.
Matteo's Landscape design takes note of information and offer complete, prompt and well-mannered watering design, installation, upkeep services that lugs a devices and labor service warranties. Get in touch with us today for additional information on our irrigation setup and upkeep services at or complete the Call Us kind -.
Yard Watering is commemorating over half a century as the industry leader in the setup and service of underground sprinkler system systems. Giving the very best irrigation solutions in Central New Jacket is our leading concern. We supply convenient sprinkler estimate consultations and our call-ahead solution to minimize any type of lost time when you require your system serviced.
A Garden Watering lawn sprinkler system is created and built to endure the examination of time. We have actually some systems set up from the 1970s still functioning today! We install the best job every time. Our domestic and business irrigation specialists are factory-trained to mount and keep any size building. Call today to schedule your watering service in Central New Jacket with one of our very qualified workplace personnel.
Lawn Sprinkler Installers West Covina, CA
Prepare your watering system for the year's harshest weather condition with our winterization solutions. Our highly educated technicians will blow the water out of the system, which aids prevent rupturing frozen pipelines and broke parts. In the springtime, we'll launch your irrigation system and cost-free it of particles and excess air, trigger your lawn sprinklers, and evaluate for performance.
Maintaining a rich, green landscape can be difficult. Whether it's the front backyard of your home or the expansive property bordering your service, it takes fairly a bit of job and often a whole lot of water to make it look its finest.
Irrigation Installer West Covina, CA
Pacific Green Landscape Maintenance
Address: 6530 Whittier Ave Whittier, CA 90601-3919Phone: (562) 203-3567
Email: [email protected]
Pacific Green Landscape Maintenance
We'll make sure healthy lawns and yards while aiding you minimize your water usage.Contact us online or call(843) 350-9163 At Conserva Irrigation of Charleston, we are greater than just an irrigation and lawn sprinkler business. We likewise have a dedication to the atmosphereand the earth we survive on. Our North Charleston watering team can assist you reduce your water usage by up to 60 %. Our business was founded on the idea of saving water and is your one-stop-shop for household and business irrigation. If you remain in the marketplace for a brand-new lawn sprinkler, Conserva Watering of Charleston is the firm to turn to. There are a couple of reasons that we may make this referral.
Lawn Irrigation System West Covina, CAIrrigation System Repair Service West Covina, CA
Residential Irrigation Repair West Covina, CA
Irrigation Service West Covina, CA
Irrigation Systems Installers West Covina, CA
Sprinkler Installation Companies West Covina, CA
Sprinkler System Installation West Covina, CA
Irrigation Service West Covina, CA
Installing A Sprinkler System West Covina, CA
Sprinkler System Installation West Covina, CA
Lawn Sprinkler Installers West Covina, CA
Irrigation Service West Covina, CA
Landscape Irrigation Repair West Covina, CA
Sprinkler Systems Near Me West Covina, CA
Residential Irrigation Repair West Covina, CA
Sprinkler System Repairs West Covina, CA
Sprinkler Installation Companies West Covina, CA
Lawn Irrigation System West Covina, CA
Sprinkler Systems Near Me West Covina, CA
Sprinkler System Repairs West Covina, CA
Lawn Sprinkler Installers West Covina, CA
Irrigation Service West Covina, CA
Lawn Sprinkler Service West Covina, CA
Irrigation Installer West Covina, CA
Install Sprinkler System West Covina, CA
Irrigation Service West Covina, CA
Irrigation Service West Covina, CA
Sprinkler System Installation West Covina, CA
Irrigation System Repair Service West Covina, CA
Sprinkler System Installation West Covina, CA
Sprinkler Installation Companies West Covina, CA
Residential Irrigation Repair West Covina, CA
Sprinkler Installer West Covina, CA
Irrigation System Installers West Covina, CA
Residential Irrigation Repair West Covina, CA
Irrigation Maintenance West Covina, CA
Irrigation System Repair Service West Covina, CA
Sprinkler Installation Companies West Covina, CA
Irrigation Service West Covina, CA
Sprinkler Systems Near Me West Covina, CA
Irrigation Installer West Covina, CA
Commercial Irrigation Services West Covina, CA
Sprinkler System Installation West Covina, CA
Sprinkler System Installer West Covina, CA
Lawn Irrigation Services West Covina, CA
Sprinkler Installers West Covina, CA
Irrigation System Maintenance West Covina, CA
Sprinkler Systems Installers West Covina, CA
Irrigation Maintenance West Covina, CA
Sprinkler Installer West Covina, CA
Lawn Irrigation System West Covina, CA
Installing A Sprinkler System West Covina, CA
Sprinkler Systems Installers West Covina, CA
Lawn Irrigation System West Covina, CA
Sprinkler Systems Installers West Covina, CA
Irrigation System Installers West Covina, CA
Install Sprinkler System West Covina, CA
Irrigation Installer West Covina, CA
Sprinkler Systems Installers West Covina, CA
Installing A Sprinkler System West Covina, CA
Sprinkler Installer West Covina, CA
Commercial Irrigation Services West Covina, CA
Sprinkler System Installer West Covina, CA
Near Here Seo West Covina, CA
Around Here Seo Companies West Covina, CA
Pacific Green Landscape Maintenance
Table of Contents
- – Sprinkler System Installation West Covina, CA
- – Pacific Green Landscape Maintenance
- – Irrigation Maintenance West Covina, CA
- – Residential Irrigation Repair West Covina, CA
- – Irrigation Installers West Covina, CA
- – Irrigation System Installers West Covina, CA
- – Residential Irrigation Repair West Covina, CA
- – Irrigation Installer West Covina, CA
- – Lawn Sprinkler Companies West Covina, CA
- – Irrigation System Installers West Covina, CA
- – Lawn Sprinkler Installers West Covina, CA
- – Irrigation Installer West Covina, CA
- – Pacific Green Landscape Maintenance
Latest Posts
Truck Fleet Services Anaheim
Rv Trailer Repair Shop Orange County
Rv Service And Repair Near Me Riverside
More
Latest Posts
Truck Fleet Services Anaheim
Rv Trailer Repair Shop Orange County
Rv Service And Repair Near Me Riverside