All Categories
Featured
Table of Contents
- – Custom Rv Paint Jobs Guasti, CA
- – OCRV Center
- – Paint Rv Guasti, CA
- – Class A Rv Custom Paint And Repair Guasti, CA
- – Custom Rv Paint Jobs Guasti, CA
- – Motorhome Custom Paint Guasti, CA
- – Motorhome Paint Repair Guasti, CA
- – Motorhome Paint Repair Guasti, CA
- – Paint Fiberglass Rv Guasti, CA
- – Motorhome Custom Paint Jobs Guasti, CA
- – Painting Fiberglass Motorhome Guasti, CA
- – Painting An Rv Guasti, CA
- – OCRV Center
Custom Rv Paint Jobs Guasti, CA
Located in Sacramento, Rehorn Recreational Vehicle Collision Facility is honored to serve you as the leader in recreational vehicle and motorhome collision repair work in northern California. Our facility is built to house some of the largest RVs, motorhomes, and trailers. There is no task too large for our licensed fixing specialists and painters whose primary emphasis is to return your RV or motorhome to pre-accident problem.
This permits us to be so certain in our work that we hold the most effective guarantee in business with our life time warranty. Our workplace team will maintain you upgraded throughout the whole service and fixing process and make certain to allow you understand of any rate modifications or time frame changes.
Paint Rv Guasti, CA
If you have actually been in an accident bring your RV or motorhome to Rehorn RV Crash Facility and we will deal with the remainder. We deal with all RV makes consisting of Winnebago, Fleetwood, Tiffin, Keystone, Monaco, and numerous more! MOTOR HOME & Motorhome Solutions we frequently supply include: Hail storm damage and roof leak repair work Roof covering repair/replacement: rubber, metal, fiberglass Awning fixing and replacement Windscreen, window and glass substitute Vent replacement Weather-strip substitute Pop out/slide out repair service Fabrication, substitute, and repair service of metal and light weight aluminum area doors and door frames Customized color matching and paint security film Custom paint, decals, and striping Graffiti removal and criminal damage repair Delaminating and fiberglass Fixes Fire and smoke damages Fiberglass front and rear cap substitutes Timber completely dry rot fixing Welding Home siding, including: Filon side wall repair/ substitutes and light weight aluminum skin J-Panel replacement Color sanding and polishing Come see why consumers continue to bring their RV's and Motorhomes to Rehorn Recreational Vehicle Accident!.
Whether it is a crash fixing or if you're wanting to fix up your rig, Representations Vehicle Body Repair Work Ltd in Chilliwack, BC, can help you out. We have experience repairing and painting all sizes and makes from motorhomes. With a 60 foot paint cubicle we are able to accommodate the most significant of buses and motorhomes.
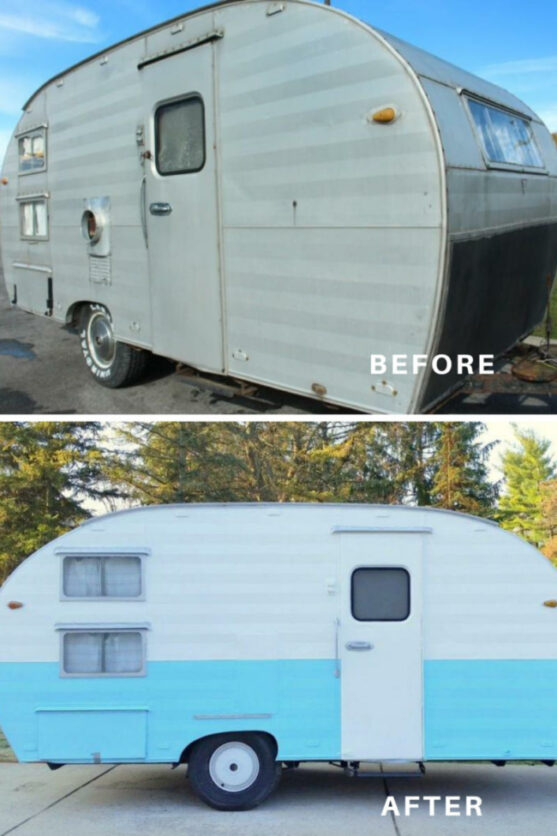
Plus, we share top product suggestions so your camper comes out looking fresh. For many years, we have actually effectively renovated 2 travel trailers leading to lower and consisting of the exteriors. To give both gears a fresh face-lift, this is the exterior painting method that we advise. Intend to have a look at both improvements? Here is the 2007 Keystone Hornet and the 2005 Keystone Hornet.
Class A Rv Custom Paint And Repair Guasti, CA
1 your camper's exterior to eliminate any type of dirt and road grime. Make sure to eliminate all stickers from areas that you plan to paint. Never repaint over decals. I recommend using a decal remover device to get rid of any type of stickers easily. Utilize a warm gun to heat the sticker so that you can manage the vinyl by hand.
Use the concealing paper to enclose larger locations from the overspray. 4 After you've taped off the locations you want to repaint, sand down all locations of the camper that you intend to paint. Make use of an 80 grit fining sand block and lightly buff the exterior to create a smooth surface area.
5 Following, clean down the Motor home's exterior with acetone and a microfiber towel to get rid of any type of oily residue that might prevent excellent attachment. Dirt from fining sand will certainly destroy the paint appearance.
Custom Rv Paint Jobs Guasti, CA
If the paint looks unequal after drying out, mess up the surface area as soon as again and apply one more layer of paint. Relying on the condition that your RV's outside was in and exactly how well you carried out in your prep work, you may require 2-3 layers of paint for a strong, smooth surface. 10 After the 2nd (or 3rd) coat of paint is completely dry, apply a clear topcoat.
The clear coat will certainly give your paint that finished appearance and safeguard the paint from chipping and fading. 11 Now it's time to delight in that lovely outside. Get rid of all painter's tape and covering up paper. When the paint has actually totally cured according to the Dupli-Color directions (or whatever recreational vehicle outside paint you chose), buff the surface area to improve the paint's look.
Motorhome Custom Paint Guasti, CA
Welcome to Rehorn RV Collision Center, an objective developed 16,000 square foot motor home solution and repair facility that is the most advanced collision fixing center in Northern California, located in Sacramento. We have actually built a track record for exceeding our customer's expectations when it comes to body and paint repair for Recreational vehicles and trailers.
The paint cubicle primarily functions as a disinfected framework that will avoid debris and dirt from triggering blemishes in the painting process. In situation you have actually already attempted looking at the obsolete and damaged aesthetics of your recreational vehicle, it is the suitable time to provide a transformation. Whether the outside component of your RV is fading, damaged, scraped or rusted, the specialized paint work of a qualified motor home Body Shop will certainly transform the appearance of your RV.
Motorhome Paint Repair Guasti, CA
It has additionally been proven to be extra beneficial to our setting. Contrasted to the typical motor home paint work, the chemicals and fumes located in the paint will be launched in the environment that can damage the environment and result in air pollution. With a huge paint cubicle, all corners are restricted that will certainly protect against the leakage of the chemicals right into the atmosphere.
An additional well-known advantage of using the paint cubicle of the Motorhome Collision Repair service is their integrity. The big paint booth provides the excellent environment to produce a refined and perfect paint task. In situation a person completes the paint task by hand, there is always a possibility that they will certainly make little mistakes regardless of how careful and seasoned they are, which might result in significant defects in the paint task.
Motorhome Paint Repair Guasti, CA
Paint booths are planned to provide a professional task. This will certainly prevent shade variation, smudges, and various other problems that you normally encounter when using the typical technique in the RV body store.
The paint can hide the damage that is caused by the collision. You will have a full range of shade to utilize on your Recreational vehicle - Rv Paint Job Guasti.
Paint Fiberglass Rv Guasti, CA
You do not need to pick the ordinary shades that we frequently see on other RVs. You will certainly be able to showcase your unique individuality with the different alternatives that you have.
I did a great deal of research right into DIY recreational vehicle outside paint before finally committing to repainting our fiberglass fifth wheel motor home. We actually lived in the RV for nearly a year prior to we painted the exterior, both because recreational vehicle outside paint prep is a BIG job and because I was worried about how it would end up.
Allow's get into it, and ideally you'll leave with some RV outside paint ideas. The initial choice in any type of paint task is determining whether to DIY it or work with expert painters.
A professional recreational vehicle exterior paint job can conveniently cost $10,000, which may make feeling if you have a more recent or really expensive rig whose value you intend to maintain. For our 2007 Keystone Raptor, that sort of financial investment really did not make feeling. You could be frightened by painting on such a large range, however I'm below to inform you that if you can repaint an area and have a tall ladder, you can do this.
Motorhome Custom Paint Jobs Guasti, CA
The experts could utilize aquatic epoxy or auto paint, which are the lengthiest lasting options. The drawbacks to these are that they're extremely costly and come in restricted shades.
We're practically a year in (and we placed our rig via a lot in Alaska!.?.!!), and I more than happy to state that there are only 2 quarter-sized high-use places that are cracking. We used 2 gallons of paint for the skim coat and several quarts or paint examples for the decorative shades.
A specialist looking paint task requires good devices, so this is not a location you wish to cut corners. I thought about renting out or buying a paint sprayer, yet ultimately determined to stick with paint rollers and brushes since I'm a lot more comfortable paint this way. It was a good decision since the surface appeared simply fine the way we did it.
Right here are the supplies we made use of: Below are the steps you'll require to take to finish your Recreational vehicle outside paint task. It took us possibly 40 hours of home heating decals that weren't fractured with a hair clothes dryer and peeling them off.
Painting Fiberglass Motorhome Guasti, CA
(we did our stove exhaust vent!.?.!!). Re-caulk any kind of joints that require it. Get your surface area as also as possible. Simply the lightest of scuffs, do not take layers off. Vacuum and remove the dirt very carefully. Tape off any fixtures or cut with painters tape. We didn't need to prime individually because the paint we picked was 2-in-1.
Go slow-moving and return to it the following day if you need to. Simply do not relocate the projector up until you're done! This is the most enjoyable part. Okay, so how is it standing up? This was my most significant interest in this project, so I intend to share the real world images! One year later on, and I'm really happy with exactly how the paint is standing up.
: I really tortured myself trying to make a decision whether to paint our RV exterior, and I am SO glad that we did. The method we did it could stress out the Recreational vehicle outside paint perfectionists, however I would 100% do this once again.
Associate earnings helps money our household travel and enables me to keep producing motivating household travel content for you. I so value when you utilize my links to make purchases you would certainly have made anyway. For more RV improvement, below are some other articles you might like:.
Painting An Rv Guasti, CA
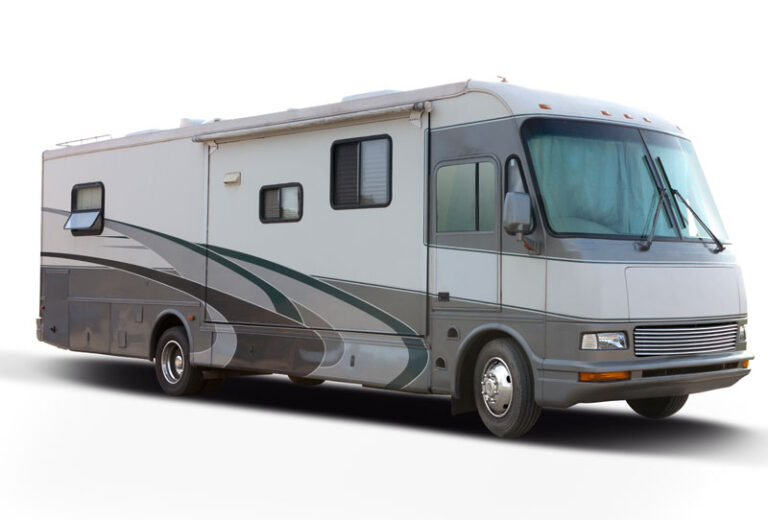
Also prominent body store chains may not have the area readily available to service a motor home, but ABC Paint & Body does. We're proud to be the only body store in the area that deals with motor home service, paint and fixing. We comprehend the usage of light weight aluminum and fiberglass in motor home building, and our paint spray booth is the just one in the city big enough to fit a RV.
In the early 2000's this was a significant problem with a variety of RV makers that bought their fiberglass from Dow Corning. It had not been simply RV's as Corvettes also suffered the same concern. Around 2006 the majority of this was resolved and has not been as major a concern as it was previously.
That stated, my 2008 Exploration 40X was constantly parked outside all year an was the dark paint plan, yet never revealed any kind of concern with monitoring. What I've continued reading the subject shows the common causes if the source is localized is something having struck the surface and triggered the undercoat to crack ultimately bring about the surface paint showing checking.
Paint Rv Guasti, CARv Painting Near Me Guasti, CA
Rv Paint Repair Guasti, CA
Painting Rv Walls Guasti, CA
Paint Rv Guasti, CA
Rv Painting Near Me Guasti, CA
Painting Rv Walls Guasti, CA
Rv Painting Guasti, CA
Custom Motorhome Paint Jobs Guasti, CA
Rv Paint Guasti, CA
Paint Motorhome Exterior Guasti, CA
Motorhome Paint Repair Guasti, CA
Paint Motorhome Exterior Guasti, CA
Rv Paint Shops Near Me Guasti, CA
Rv Paint Shops Near Me Guasti, CA
Paint Fiberglass Rv Guasti, CA
Motorhome Painting Near Me Guasti, CA
Custom Motorhome Paint Jobs Guasti, CA
Rv Painter Guasti, CA
Paint Motorhome Exterior Guasti, CA
Custom Painted Motorhomes Guasti, CA
Painting Rv Exterior Guasti, CA
Rv Paint Repair Guasti, CA
Motorhome Custom Paint Jobs Guasti, CA
Motorhome Paint Shops Guasti, CA
Motorhome Paint Shops Guasti, CA
Rv Exterior Paint Guasti, CA
Custom Rv Paint Jobs Guasti, CA
Rv Paint Guasti, CA
Painting An Rv Guasti, CA
Rv Paint Job Guasti, CA
Painting Rv Walls Guasti, CA
Motorhome Paint Repair Guasti, CA
Paint Rv Guasti, CA
Rv Paint Job Guasti, CA
Paint Fiberglass Rv Guasti, CA
Rv Painting Guasti, CA
Motorhome Custom Paint Guasti, CA
Paint Fiberglass Rv Guasti, CA
Custom Rv Paint Jobs Guasti, CA
Rv Painter Guasti, CA
Motorhome Custom Paint Guasti, CA
Paint Rv Guasti, CA
Motorhome Painting Near Me Guasti, CA
Custom Painted Motorhomes Guasti, CA
Motorhome Paint Repair Guasti, CA
Paint Motorhome Exterior Guasti, CA
Painting Rv Exterior Guasti, CA
Motorhome Painting Guasti, CA
Custom Painted Motorhomes Guasti, CA
Rv Paint Shops Near Me Guasti, CA
Paint Fiberglass Rv Guasti, CA
Painting Fiberglass Motorhome Guasti, CA
Motorhome Painting Guasti, CA
Rv Paint And Repair Guasti, CA
Rv Paint Repair Guasti, CA
Painting Rv Walls Guasti, CA
Paint Fiberglass Rv Guasti, CA
Rv Painting Near Me Guasti, CA
Paint Motorhome Exterior Guasti, CA
Rv Painting Near Me Guasti, CA
Rv Painting Guasti, CA
Rv Paint Shops Near Me Guasti, CA
Rv Paint Shops Near Me Guasti, CA
Class A Rv Custom Paint And Repair Guasti, CA
Painting Rv Guasti, CA
Motorhome Painting Guasti, CA
Motorhome Paint Repair Guasti, CA
Motorhome Custom Paint Jobs Guasti, CA
Rv Paint And Repair Guasti, CA
Rv Paint And Repair Guasti, CA
Custom Painted Motorhomes Guasti, CA
Motorhome Painting Near Me Guasti, CA
Custom Painted Motorhomes Guasti, CA
Rv Paint Guasti, CA
Motorhome Painting Guasti, CA
Paint Fiberglass Rv Guasti, CA
Motorhome Paint Shops Guasti, CA
Near My Location Seo Expert Guasti, CA
Near You Seo Services Guasti, CA
OCRV Center
Table of Contents
- – Custom Rv Paint Jobs Guasti, CA
- – OCRV Center
- – Paint Rv Guasti, CA
- – Class A Rv Custom Paint And Repair Guasti, CA
- – Custom Rv Paint Jobs Guasti, CA
- – Motorhome Custom Paint Guasti, CA
- – Motorhome Paint Repair Guasti, CA
- – Motorhome Paint Repair Guasti, CA
- – Paint Fiberglass Rv Guasti, CA
- – Motorhome Custom Paint Jobs Guasti, CA
- – Painting Fiberglass Motorhome Guasti, CA
- – Painting An Rv Guasti, CA
- – OCRV Center
Latest Posts
Swamp Cooler Pump Repair San Marino
Hvac Maintenance Tujunga
Commercial Duct Cleaning Service Altadena
More
Latest Posts
Swamp Cooler Pump Repair San Marino
Hvac Maintenance Tujunga
Commercial Duct Cleaning Service Altadena