All Categories
Featured
Table of Contents
- – Motorhome Custom Paint Foothill Ranch, CA
- – OCRV Center
- – Rv Paint And Body Shops Near Me Foothill Ranch...
- – Painting Rv Exterior Foothill Ranch, CA
- – Painting Rv Exterior Foothill Ranch, CA
- – Rv Painting Near Me Foothill Ranch, CA
- – Paint Motorhome Exterior Foothill Ranch, CA
- – Motorhome Paint Repair Foothill Ranch, CA
- – Custom Motorhome Paint Jobs Foothill Ranch, CA
- – Rv Painting Foothill Ranch, CA
- – Rv Painting Near Me Foothill Ranch, CA
- – Rv Painting Near Me Foothill Ranch, CA
- – Custom Rv Paint Foothill Ranch, CA
- – Paint Fiberglass Rv Foothill Ranch, CA
- – OCRV Center
Motorhome Custom Paint Foothill Ranch, CA
(This might have been overkill but I'm realllllllly a huge mess). If I have one recommendation concerning taping ... it's to utilize high quality painters tape. I'm a substantial proponent of getting points at the buck store ... however great painters tape, in my opinion, is worth paying a little extra for.
Really feel complimentary to take your time while taping off your motor home walls and closets. The more precise your insulation is, the less problems you'll have when you remove it after paint. When selecting paint and guide for your RV walls and cabinets ... it's actually important that you make use of 2 different items.
If you avoid any type of step in this procedure ... do not allow it be the primer. In every blog post, facebook group and forum I've inspected ... this has been the product that they promise by.
Considering that we were finding and handling substantial water damages problems when I was preparing to repaint ... I determined to utilize since of its mold resistant properties. I knew that I was taking a danger making use of a much less adhesive primer, but the profession off appeared worth it at the time.
Rv Paint And Body Shops Near Me Foothill Ranch, CA
For my paint selection, I selected a white semi-gloss latex paint from Ace Equipment (shop brand name, called Royal). I was initially intending on choosing a water based paint, but the Ace Hardware associate lead me towards the more affordable choice. (You understand I loveee to save cash!) I had to apply 2 coats (as anticipated) ...
Because I ended up paint, we have actually torn down and replaced the ceiling. and I had the ability to quickly wipe down the cabinets after to look as nice as they did when I first repainted them. Regrettably, because our camper has come to be an active building website ... several of the paint has actually already been scuffed off by tools, and roaming ply-wood.
Various other than the damage we've currently triggered to our newly repainted Recreational vehicle . I'm extremely delighted with the outcome. The end result of your RV indoor paint work relies on your persistence in the primary stages.
White, yellow and Tiffany blue have actually been my favorite recreational vehicle interior paint colors. I additionally dig vivid colors as accents. (As an example: teal cabinets, white wall surfaces). Prime! Prime! Prime! ... seriously. Please, don't neglect this step unless you hate yourself. View out for drips! We didn't pay enough interest in the priming phase and wound up with some noticeable drips that were dried right into the paint.
Painting Rv Exterior Foothill Ranch, CA
When I first started planning the RV remodel I was very against painting the wall surfaces. For some reason, I thought they would be a gigantic pain and require great deals of prep, plus the spongy brownish was relatively neutral and unobjectionable. In hindsight, that was stupid. My hubby told me that was silly, and he was right.
It looks less like an obsolete traveling trailer and more like a little home. Here is the prior to After the cupboards were painted Here it is currently, with the wall surfaces repainted as well (and I may have leapt the weapon and included some of the rustic timber behind the Television.
Believe me on this. So right here are the steps you must comply with to correctly paint the wall surfaces in your camper. you do not need to go insane, yet scuffing up the wall surfaces a bit will help the guide adhere. A sanding sponge would be easiest. My suggestion for this would certainly be TSP.
After cleaning, wash the wall surfaces with water and allow completely dry totally. If you desire to make use of an oil-based primer, my favorite is Zinsser Cover Stain (Kilz is also an excellent choice). Oil-based jobs best (it's the only point that functioned in the cabinets) however the tidy up is a pain and it scents dreadful, particularly in a tiny space like a motor home.
Painting Rv Exterior Foothill Ranch, CA
We made use of the shade Silvermist from Sherwin Williams in an eggshell finish. Those are the actions you follow for paint RV walls, but right here is what I actually did Prime Paint That's it.
The whole thing only took regarding a day, because there actually isn't a lots of wall surface location to cover. Right here it is with simply guide And more images of the finished walls What's funny is that the paint I made use of is just remaining paint from your house, it's the very same color that remains in our bedroom.
Rv Painting Near Me Foothill Ranch, CA
The exact same color in the Recreational vehicle looks quite vibrantit's nearly a robins egg blue. It just verifies that you need to never utilize a paint color without initial trying an example on your wall, because the very same color can look very Extremely different depending on the location and lights.
Alright, to ensure that's the upgrade! The next step is to repaint all the countertops, which I believe will certainly be very simple.
As a motor home proprietor, it is very important to maintain your automobile in top shape, both in and out. Your recreational vehicle's exterior and paint task not just boost its appearance, but they additionally secure it from rough weather, debris, and other elements that can cause damages. Here are some tips for maintaining your motor home's outside and paint work, so you can appreciate your lorry for years ahead.
Dust, dust, and crud can collect on the surface area of your RV and cause damage to the paint. By cleaning your Motor home regularly, you can remove this build-up and protect the paint.
Paint Motorhome Exterior Foothill Ranch, CA
Severe climate condition, such as wind, rain, and snow, can trigger damages to your motor home's paint and exterior. To shield your automobile, make certain to store it in a covered area or utilize a protective cover when not being used. This will help to stop water spots, fading, and other weather-related damages.
Professional describing services can assist to keep your Recreational vehicle's outside and paint work in top condition. These services can assist to keep the appearance and value of your Recreational vehicle, so consider investing in them regularly.
Routine upkeep and protection will certainly assist to maintain your recreational vehicle in leading condition and make certain that you can appreciate it for several years ahead. If you have any issues or inquiries concerning maintaining your RV's exterior and paint task, be sure to get in touch with an expert motor home body and paint store.
Motorhome Paint Repair Foothill Ranch, CA
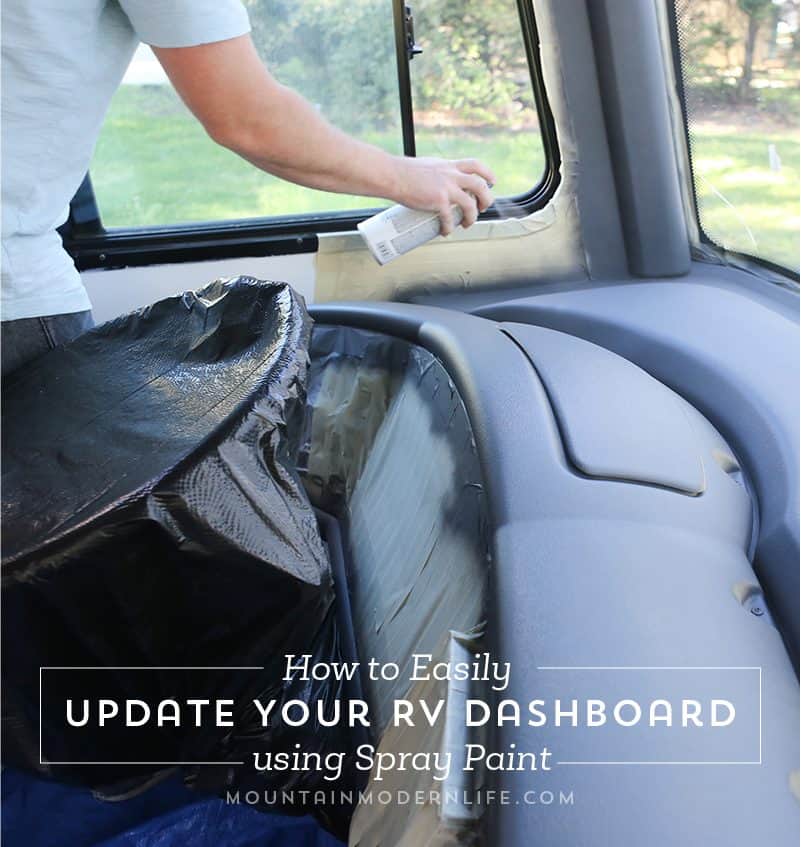
Replicated this from a short article: When it concerns offering a motor home indoor new life, there's most likely no far better device than paint. It can make your space look cleaner and brighter, and includes a contemporary touch to outdated design. Repainting the inside of a Recreational vehicle isn't as basic as grabbing a can and getting to work.
Remove any type of boundaries that are stayed with the top of the wallpaper by spraying a mix of water and fabric softener on the location, or by making use of a warmth weapon to loosen up the adhesive. Regardless of what surface area you're painting, it is necessary to prep it beforehand. In the situation of wallpaper, wipe any crud with an all-round cleaner or diluted vinegar and allow it completely dry.
It can be rather fast to repaint motor home closets with a great roller and a brush or 2, yet it's remarkably simple to ruin. A lot of motor home closets are made of laminate, which implies they require to be sanded and topped before painting or the paint will not dry properly. Worse, if you use latex paint without any base layer, the shade will at some point bubble, split, and peel right off.
Custom Motorhome Paint Jobs Foothill Ranch, CA
However initially, because you can not reverse your job when you paint over your plastic wall surfaces, allow's check out the advantages and disadvantages for repainting them. There are much easier and much less long-term means to include an individual touch to your motor home than paint - Rv Paint And Repair Foothill Ranch. When we first got our RV, we looked at various other ways to enhance the look without painting over the washable vinyl
That stated, none of these updates made as large an influence as paint. Which is why we inevitably made a decision to paint a number of interior walls in our RV. Like any home, you may intend to reveal your individual style in your home-on-wheels. Also painting simply a couple of accent wall surfaces to match your decor can make your home really feel even more comfortable.
A fresh coat of paint can do wonders to contemporize your motor home's look. Over the years, RVs can take a lot of abuse. When properly used, a fresh layer of paint will cover a variety of transgressions like smoke, water damages, and other spots. This is especially useful thinking about that the majority of motor home 'hotels' or parks are embeded in nature which implies undoubtedly bringing dust right into your RV.
Okay, I have actually offered you sufficient cautions concerning repainting your RV's wall surfaces! If you're still reading possibilities are you have actually already thought it via, and still wish to repaint them like we did. Bear with me, as I'll invest time discussing what wall surfaces to repaint, color option, and wall preparation, than the actual painting.
Rv Painting Foothill Ranch, CA
The majority of people understand exactly how to paint with a brush or roller, and great prep work is the key to successfully painting anything specifically recreational vehicle wall surfaces. Some individuals desire to go hog-wild and paint all their indoor wall surfaces, while others only intend to add a few accent wall surfaces (like us). It's vital that you are sure you wish to progress before you touch paint to wall surface for the reasons noted earlier.
That method if you do not love it, you can constantly paint it a neutral color and it will not be recognizable. It's likewise a lot much less job and a lot easier to take care of than painting an entire RV -particularly for your very first time. If all works out and you desire to paint the rest of the walls then, you can always go for it.
Rv Painting Near Me Foothill Ranch, CA
Which walls appear like they could take advantage of painting? Where could you utilize a pop of shade? Which wall would you like to reduce? In our case we repainted 4 accent wall surfaces in a dark brownish. We had a number of wall surfaces that were covered in timber laminate. We felt this 'synthetic wood' cheapened the look of our home, so we painted 2 of those wall surfaces.
We repainted a fourth wall that had two big, black 'storage tank degree' panels, and the brown paint helped the panels decline. Depending on the dimension of your motor home, you can repaint anywhere from 1-6 accent wall surfaces. Right here's a good post that discuss accent walls. For months we debated concerning painting all the plastic walls in our recreational vehicle.
We ultimately chose to maintain a lot of the easy-clean vinyl on most of the wall surfaces, plus I've painted enough to understand that our smaller motor home would certainly be challenging to paint well with all its dilemmas. That said, some RVers have actually invested the moment and energy to paint all their wall surfaces, with great-looking results! It's a personal option and if you have more time and persistence than we did (and much less projects) that assists.
Rv Painting Near Me Foothill Ranch, CA
That said, finding a good color system for the interior of a Recreational vehicle is complicated. Recreational vehicle's can be dark, so shades you think look good in the light of day, do not look the same inside your RV.
Choose a color that will certainly function well with your floors, closets, and home designs. I suggest neutrals like tan, lotion, beige, taupe, etc to many people as they're extremely flexible. Brown can be made use of, however I just advise it as an accent color as it's dark. Black is also dark, and while white actually lightens up the interior of a motor home, it will certainly look filthy quickly if you live full-time in recreational vehicle camping sites like we do.
Custom Rv Paint Foothill Ranch, CA
Ours has browns, lotions, and tans on the outside. We suched as those colors, so we brought the brown paint inside. It's simply one option, but it exercised actually well. When you've tightened in on some colors, pick out lots of example shade chips. From your leading 6 colors, narrow shade down even additional by buying and testing out several samples.
When thinking concerning what kind of paint to utilize, I ask the specialists at any kind of excellent Paint facility. In this manner you can inform them precisely what surface you're painting over, and they can recommend you on the most effective item. That stated, a premium water based paint in an eggshell finish ought to work just great.
But because of major developments in paint production methods, I've transformed my mind. With correct surface area prep work and priming, I've found the water-based paints to stand up extremely well. Glidden Gripper Along with the appropriate paint, the most vital thing is the guide. In this case, by far, we suggest an item called.
Paint Fiberglass Rv Foothill Ranch, CA
( I've made use of container for several years, but also for motor home wall surfaces, nothing beats Gripper's texture and gripping power) If we had actually made use of Gripper the very first time around, we would certainly could have avoided a large mess. I'll share extra symphonious 5, Priming the Wall surfaces. When you make your listing placed Gripper at the top! Not to be outdone by Glidden, Kilz also has their own sticky primer that's designed to be utilized on hard-to-paint surface areas.

Make sure to ventilate your Motor home to reduce fumes. A little songs, and some beverage may make the time go by even more quickly as well! Next off, with a screwdriver, take off anything that shouldn't be on the wall surfaces.
Custom Painted Motorhomes Foothill Ranch, CAClass A Rv Custom Paint And Repair Foothill Ranch, CA
Rv Painter Foothill Ranch, CA
Paint Fiberglass Rv Foothill Ranch, CA
Motorhome Custom Paint Jobs Foothill Ranch, CA
Painting Fiberglass Motorhome Foothill Ranch, CA
Custom Rv Paint Foothill Ranch, CA
Paint Rv Foothill Ranch, CA
Painting Rv Exterior Foothill Ranch, CA
Class A Rv Custom Paint And Repair Foothill Ranch, CA
Rv Paint Repair Foothill Ranch, CA
Custom Rv Paint Jobs Foothill Ranch, CA
Rv Paint And Repair Foothill Ranch, CA
Rv Paint Shops Near Me Foothill Ranch, CA
Paint Motorhome Exterior Foothill Ranch, CA
Rv Exterior Paint Foothill Ranch, CA
Rv Paint Shop Near Me Foothill Ranch, CA
Rv Paint Shop Near Me Foothill Ranch, CA
Painting Fiberglass Motorhome Foothill Ranch, CA
Rv Paint And Repair Foothill Ranch, CA
Rv Paint And Repair Foothill Ranch, CA
Motorhome Painting Near Me Foothill Ranch, CA
Painting Rv Foothill Ranch, CA
Rv Paint Shops Near Me Foothill Ranch, CA
Motorhome Paint Repair Foothill Ranch, CA
Rv Paint And Body Shops Near Me Foothill Ranch, CA
Painting An Rv Foothill Ranch, CA
Class A Rv Custom Paint And Repair Foothill Ranch, CA
Paint Fiberglass Rv Foothill Ranch, CA
Painting Fiberglass Motorhome Foothill Ranch, CA
Rv Painting Foothill Ranch, CA
Rv Paint Shop Near Me Foothill Ranch, CA
Rv Paint Foothill Ranch, CA
Rv Paint And Repair Foothill Ranch, CA
Custom Painted Motorhomes Foothill Ranch, CA
Rv Exterior Paint Foothill Ranch, CA
Custom Rv Paint Foothill Ranch, CA
Painting Rv Exterior Foothill Ranch, CA
Rv Paint Shops Near Me Foothill Ranch, CA
Custom Painted Motorhomes Foothill Ranch, CA
Rv Paint Shops Near Me Foothill Ranch, CA
Custom Rv Paint Jobs Foothill Ranch, CA
Rv Painter Foothill Ranch, CA
Rv Painting Near Me Foothill Ranch, CA
Custom Rv Paint Foothill Ranch, CA
Rv Paint Repair Foothill Ranch, CA
Paint Motorhome Exterior Foothill Ranch, CA
Rv Paint And Repair Foothill Ranch, CA
Motorhome Paint Repair Foothill Ranch, CA
Custom Rv Paint Foothill Ranch, CA
Rv Painting Near Me Foothill Ranch, CA
Rv Paint Repair Foothill Ranch, CA
Motorhome Painting Foothill Ranch, CA
Rv Paint Repair Foothill Ranch, CA
Motorhome Paint Repair Foothill Ranch, CA
Rv Paint Shop Near Me Foothill Ranch, CA
Motorhome Custom Paint Jobs Foothill Ranch, CA
Rv Paint Foothill Ranch, CA
Motorhome Paint Shops Foothill Ranch, CA
Custom Rv Paint Jobs Foothill Ranch, CA
Paint Motorhome Exterior Foothill Ranch, CA
Paint Rv Foothill Ranch, CA
Rv Paint Job Foothill Ranch, CA
Custom Painted Motorhomes Foothill Ranch, CA
Custom Painted Motorhomes Foothill Ranch, CA
Custom Rv Paint Foothill Ranch, CA
Custom Motorhome Paint Jobs Foothill Ranch, CA
Painting Fiberglass Motorhome Foothill Ranch, CA
Motorhome Custom Paint Jobs Foothill Ranch, CA
Paint Fiberglass Rv Foothill Ranch, CA
Rv Exterior Paint Foothill Ranch, CA
Rv Exterior Paint Foothill Ranch, CA
Painting Rv Walls Foothill Ranch, CA
Painting An Rv Foothill Ranch, CA
Motorhome Custom Paint Jobs Foothill Ranch, CA
Rv Paint Shops Near Me Foothill Ranch, CA
Motorhome Painting Foothill Ranch, CA
Rv Painting Foothill Ranch, CA
Near Here Seo Plans Foothill Ranch, CA
Find Seo Packages Foothill Ranch, CA
Rv Paint And Repair [:city], [:state]
OCRV Center
Table of Contents
- – Motorhome Custom Paint Foothill Ranch, CA
- – OCRV Center
- – Rv Paint And Body Shops Near Me Foothill Ranch...
- – Painting Rv Exterior Foothill Ranch, CA
- – Painting Rv Exterior Foothill Ranch, CA
- – Rv Painting Near Me Foothill Ranch, CA
- – Paint Motorhome Exterior Foothill Ranch, CA
- – Motorhome Paint Repair Foothill Ranch, CA
- – Custom Motorhome Paint Jobs Foothill Ranch, CA
- – Rv Painting Foothill Ranch, CA
- – Rv Painting Near Me Foothill Ranch, CA
- – Rv Painting Near Me Foothill Ranch, CA
- – Custom Rv Paint Foothill Ranch, CA
- – Paint Fiberglass Rv Foothill Ranch, CA
- – OCRV Center
Latest Posts
Senior Insurance Advisor Fountain Valley
San Clemente Health Insurance Seniors
Seniors Insurance Mission Viejo
More
Latest Posts
Senior Insurance Advisor Fountain Valley
San Clemente Health Insurance Seniors
Seniors Insurance Mission Viejo