All Categories
Featured
Table of Contents
- – Camper Roof Repair Near Me Walnut, CA
- – OCRV Center
- – Rv Camper Repair Near Me Walnut, CA
- – Camper Roof Repair Near Me Walnut, CA
- – Camper Repair Places Near Me Walnut, CA
- – Camper Roof Replacement Walnut, CA
- – Camper Roof Replacement Walnut, CA
- – Camper Repair And Service Walnut, CA
- – Pop Up Camper Roof Replacement Walnut, CA
- – Camper Trailer Service Near Me Walnut, CA
- – Pop Up Camper Repair Near Me Walnut, CA
- – OCRV Center
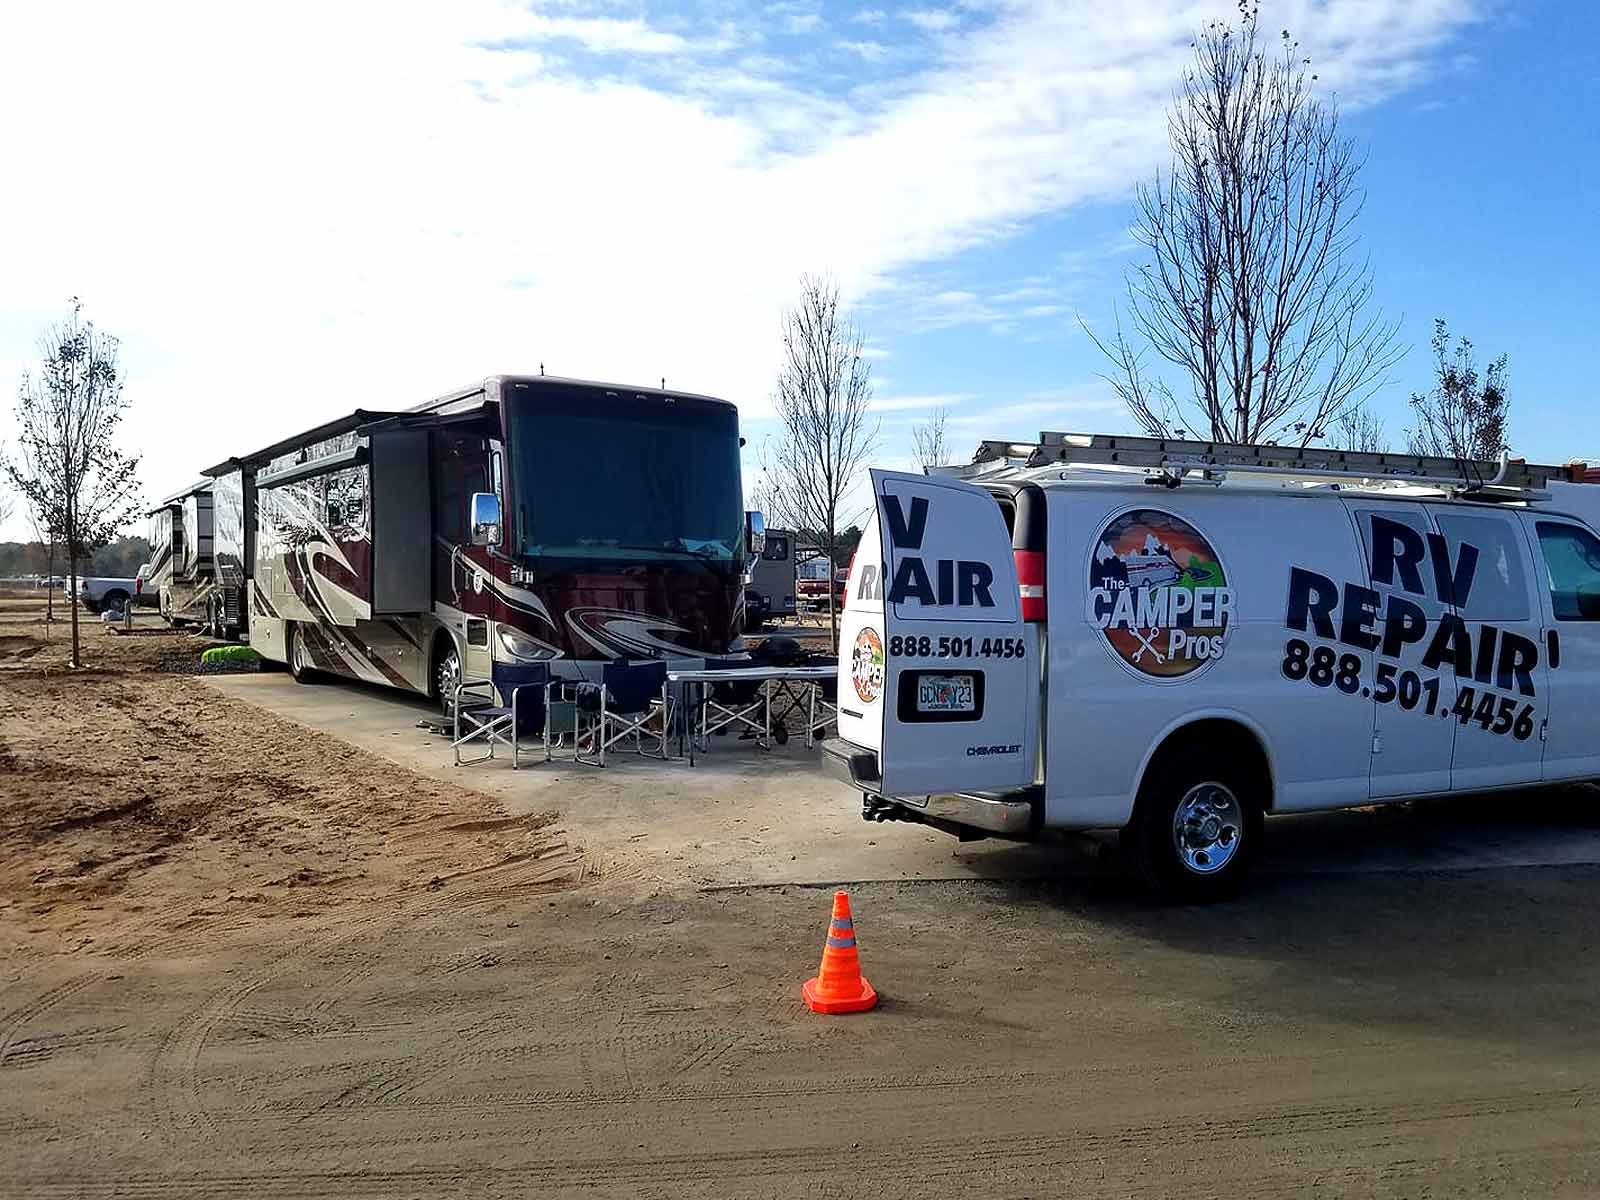
Camper Roof Repair Near Me Walnut, CA
we recognize all extended and the majority of manufacturing facility warranties. Our factory trained and accredited technicians also service all major home appliances consisting of: Norcord, Dometic, Motor Home Products, Carrier, Hydro-Flame, Suv and extra. "Bret is just one of the most clever and valuable motor home fixing professionals that comes to your location. He can basically take on any trouble in a traveling trailer or 5th wheel.
All the work was carried out in my driveway with nominal costs. He does warranty help Jayco motor home's, yet he does various other brand names also. It was evident that he has serviced RV's for a long period of time!".
Really trusted and as a women recreational vehicle proprietor he shows you how to do points on your camper, so you can have the knowledge of just how things work. I have utilized Open Roadway 2 times so far. As soon as when I was camping and my camper required service and they just concerned my home and winterized my RV.
Rv Camper Repair Near Me Walnut, CA
At McClain's recreational vehicle Warehouse stores we have RV's to buy spanning acres for you to pick from consisting of new and used traveling trailers to buy and motorhomes available for sale. At our Warehouse stores, our goal is to serve you and bring you the very best motor home's offer for sale in Oklahoma and Texas. It is our concern to assist you make an informed choice to leave our great deal with the very best RV for you.
The groups at all of our McClain's Recreational vehicle SuperStore places are expert, friendly and their main objective is to make your shopping experience satisfying. We are one of the ideal RV car dealerships in Texas!
Camper Roof Repair Near Me Walnut, CA
We have areas in Denton, Ft Well Worth, Rockwall, Oklahoma City, Sanger and Kerrville.
Top quality, worth, and development are the core worths that have actually been a component of the Gulf Stream Coach method of operating considering that it was established in Nappanee, Indiana, by Jim Shea and his kids. Today Gulf Stream Train is the market's leading family-owned, family-operated recreational vehicle supplier, incorporates 22 brands with over 140 different models all brought to you by the most devoted and knowledgeable group of associates in the market.
Camper Repair Places Near Me Walnut, CA
Using residential-style studs, spun fiberglass insulation, and aluminum house siding for time-honored resilience and economic climate, in lengths from 20 ft. to 41 ft., our Main Line trailers are for committed RVers that recognize what they want and acknowledge high quality. Ideal for first-timers, value-oriented, and laid-back campers, incorporating economical pricing with tough yet light-weight go-anywhere building and construction.
Campgrounds may include a selection of centers, such as restrooms, potable water, electric hookups, outing areas, trash bin, outdoor tents pads and team sanctuaries. However, lots of campgrounds do not have every one of these features and might just have a picnic table and fire ring. Make sure to examine the camping site's web site or call the suitable area office when intending your journey.
These fees help maintain the centers. Choosing a camping area is normally on an initial come first serve basis. Cost websites vary in rate.
Pay camp fee within thirty minutes of inhabiting a website. A campsite is rented out just once it has been paid completely with the pay-stub correctly completed and displayed on site and the website is occupied by campers. Do not leave personal effects neglected for even more than 72 hours (or as defined at each website).
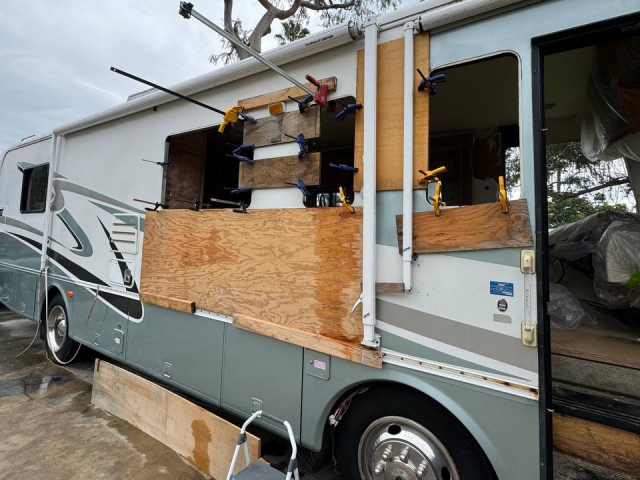
Camper Roof Replacement Walnut, CA
Not all flat areas are websites. Preferably, please usage existing websites to avoid developing new disturbances. To even more shield your public lands, campers need to not take care of any kind of refuse, dangerous materials, sewage, or in any kind of way contaminate the surrounding location.
nuCamp has actually been manufacturing drop trailers and tiny campers considering that 2004, which places us ahead of the small living fad. Currently is the best time to update from tent camping. Our tiny trailers, small campers, and pick-up truck campers are made to go off the grid, enabling you to discover off the beaten track and take the road less traveled.

Motivated by European influences, our campers feature a modern-day look that will certainly capture everybody's eye. These small, portable campers allow you bring the conveniences of home on the roadway without compromising on high quality. nuCamp's owner, Joe Mullet, has actually passionately cultivated a culture of authentic care for both our group members and the campers we craft for our treasured consumers.
Every solitary one of our campers is carefully handcrafted at our state-of-the-art manufacturing center in Sugarcreek, Ohio. Our unwavering objective is to produce phenomenal RVs for our outstanding customers.
Camper Roof Replacement Walnut, CA
Head on over to our web page to have a look at a detailed introduction of several of our leading RVs! With our high-volume purchasing power we are able to deliver you the cheapest nationwide rates on all our inventory. Meyer's recreational vehicle is the largest household owned and run dealership in the Northeast with over 180 years of consolidated experience.
If you have any type of concerns or want more details, you can today for all the information!.
Camper Repair And Service Walnut, CA
Supplies more versatility with access to a smaller, secondary automobile for exploring and extra space. Gives the very best rent-and-go alternative and enables simpleness when it pertains to establishing camp, just move the RV right into park.
Check and Caulk roofing where essential. Visual examination of axles, center and lube where feasible. Evaluate RV furnace tidy heating system blower, burning chamber and control compartment, removing any dust. Inspect RV warm water heating unit flush holding container, by hand run pressure temperature safety valve and tidy heater tube (as outlined by the manufacturer) as needed.
Inspect the total condition of your A/c device(s). Tidy and straighten out the Motor home Air conditioner evaporator and condenser coils.
We have the devices and experience to get your RV in prime shape, which indicates even more roadway time for you (Camper Service Center Walnut). Offer us a call and we'll get you in and out of the shop in a reliable and timely way, so you can get back to experiencing the freedom that the RV way of life gives
Pop Up Camper Roof Replacement Walnut, CA
Come to talk with us about exactly how to best maintain your investment and discover more regarding our readily available solutions! Telephone call, go to, or call us today. We're right here to aid.
We have years of experience in recreational vehicle repair work, trailer fixing, and manufacture. Furthermore, we can meet all your towing requires from 5th wheel hitch setup to base plate and tow bar installation. We have accessibility to a range of parts for your entertainment needs. What collections us apart from a dealer-based fixing facility or various other fixing shops is our know-how in manufacture.
We ourselves have been held restricted to uninterested, non motivated repair work facilities. That is why we opened this facility, so we can look after you like we would intend to be looked after ourselves. Car dealership Manufacture and services Welding Apartment tow packages Roof Reseal Metal Construction Television Upgrades Satellite Install TowBars 5th Wheel Hitches General Hitches Airbag Installation Running Boards Back Up Cameras Jack Service SxS Service SxS personalized cages Too Much To Note Telephone Call (714) 550-0222 for More Info.
Our motorhome experts work in a state-of-the-art center with OEM scanners and equipment utilized in quick diagnostics. We utilize just the most effective top quality parts in all our repair services and in a lot of cases can have your automobile roadway deserving the very same day. Open up 6 days a week we schedule Saturday consultations.
Camper Trailer Service Near Me Walnut, CA
In the same location for over 25 years we are a family had and operated company dedicated to the greatest standards of high quality in all job that we perform - Camper Service Center Walnut. Bring you Rv to make use of for the following: A/C Repair works and Service Brake Services and Solution Diagnostics Driveline Repair Service Electrical Services Heavy Services Routinely Set Up Maintenance Seasonal Upkeep Oil Adjustments Suspension Fixes Transmission Repair work Our facility is safeguarded for over night job and we can schedule an affordable rental cars and trucks or offer courtesy shuttle bus service to your office or home call us today at 714-465-5199 for Winnebago fixings
714-465-5199 Concerned Recreational Vehicle Repair Work Huntington Coastline CA for exceptional upkeep service and fixings. We are centrally located and offer solution throughout the Orange Region CA location. Our group of ASE Master Licensed Service technicians give a comprehensive vehicle assessment with every solution. We test drive your car and check fluid degrees consisting of the brake liquids making certain that you are safe out on the open roadway.
With over 30 years experience in the market we are the areas number # 1 selection in motor home service or repair service. We know that seasonal service on your Air conditioner is the finest way to make certain it is working at capacity prior to you are trucking via the desert.
Pop Up Camper Repair Near Me Walnut, CA
We have actually seen and dealt with simply regarding everything that you can picture as far as Motor home's and trailers are worried. We intend to present a level of service to you that is means past simply supplying a quick fix.
You are worthy of a greater level of solution and respect than those other repair service services are offering. We've functioned in one kind or one more for over 15 years. Throughout that time we have actually had the ability to recruit an assistance staff that we not only really feel entirely comfortable with, however are also consistently impressed by simply exactly how thorough their mechanical expertise goes.
OCRV Center
Address: 23281 La Palma Ave Yorba Linda, CA 92887Phone: (714) 909-1444
Email: [email protected]
OCRV Center
"EXO mobile recreational vehicle service was the 3rd car/ recreational vehicle repair work firm that I had managed in the previous year, and I'll inform you ... they were the most effective. Not only did they cost much less, they were friendlier, extra specialist."Copyrights 2015, ExoMobileRVService. All civil liberties booked. Email: [email protected] send us an email making use of the type belowWe offer top quality help, repair and maintenance for RV owners.
Camper Repair Walnut, CARv Camper Ac Repair Walnut, CA
Camping Repair Near Me Walnut, CA
Camper Service Walnut, CA
Camper Roof Repair Walnut, CA
Camper Services Walnut, CA
Camper Service And Repair Walnut, CA
Camper Roof Repair Walnut, CA
Camper Awning Replacement Walnut, CA
Camper Repair Walnut, CA
Camper Service Center Walnut, CA
Rv Camper Ac Repair Walnut, CA
Camper Awning Replacement Walnut, CA
Pop Up Camper Roof Replacement Walnut, CA
Camper Repair And Service Walnut, CA
Camper Repair And Service Walnut, CA
Camper Awning Repair Walnut, CA
Camper Repair Near Me Walnut, CA
Camper Trailer Repair Walnut, CA
Camper Trailer Repair Near Me Walnut, CA
Pop Up Camper Roof Replacement Walnut, CA
Rv Camper Ac Repair Walnut, CA
Camper Service Near Me Walnut, CA
Pop Up Camper Repair Near Me Walnut, CA
Camper Repair Shops Near Me Walnut, CA
Pop Up Camper Canvas Repair Walnut, CA
Camper Roof Repair Near Me Walnut, CA
Camper Repair Walnut, CA
Camper Service Near Me Walnut, CA
Camper Services Walnut, CA
Camping Repair Near Me Walnut, CA
Camper Air Conditioner Repair Near Me Walnut, CA
Camper Services Walnut, CA
Rv Camper Ac Repair Walnut, CA
Rv Camper Ac Repair Walnut, CA
Pop Up Camper Repair Walnut, CA
Pop Up Camper Repair Walnut, CA
Camper Service Center Walnut, CA
Camper Repair Near Me Walnut, CA
Camper Service And Repair Walnut, CA
Camper Trailer Repair Near Me Walnut, CA
Rv Camper Repair Near Me Walnut, CA
Rv Camper Repair Walnut, CA
Camper Service And Repair Walnut, CA
Camper Roof Repair Walnut, CA
Rv Camper Ac Repair Walnut, CA
Camper Trailer Service Near Me Walnut, CA
Pop Up Camper Repair Walnut, CA
Camper Service Center Walnut, CA
Camper Repair And Service Walnut, CA
Pop Up Camper Roof Repair Walnut, CA
Camper Roof Repair Walnut, CA
Pop Up Camper Roof Replacement Walnut, CA
Rv Camper Ac Repair Walnut, CA
Camper Roof Repair Near Me Walnut, CA
Camper Repair Shop Walnut, CA
Pop Up Camper Repair Near Me Walnut, CA
Camper Service Center Walnut, CA
Camper Repair Near Me Walnut, CA
Camper Roof Repair Near Me Walnut, CA
Camper Awning Repair Walnut, CA
Camper Repair Near Me Walnut, CA
Camper Repair Walnut, CA
Camper Repair Near Me Walnut, CA
Rv Camper Ac Repair Walnut, CA
Camper Repair Walnut, CA
Camper Repair And Service Walnut, CA
Camper Service Center Walnut, CA
Rv Camper Repair Near Me Walnut, CA
Camper Repair Shop Near Me Walnut, CA
Rv Camper Repair Walnut, CA
Camper Repair Shops Near Me Walnut, CA
Camper Repair Places Near Me Walnut, CA
Pop Up Camper Repair Near Me Walnut, CA
Camper Trailer Repair Walnut, CA
Camper Awning Replacement Walnut, CA
Camper Awning Repair Walnut, CA
Camper Repair Shops Near Me Walnut, CA
Best Seo Marketing Agency Walnut, CA
Finding A Seo For Law Firms Walnut, CA
OCRV Center
Table of Contents
- – Camper Roof Repair Near Me Walnut, CA
- – OCRV Center
- – Rv Camper Repair Near Me Walnut, CA
- – Camper Roof Repair Near Me Walnut, CA
- – Camper Repair Places Near Me Walnut, CA
- – Camper Roof Replacement Walnut, CA
- – Camper Roof Replacement Walnut, CA
- – Camper Repair And Service Walnut, CA
- – Pop Up Camper Roof Replacement Walnut, CA
- – Camper Trailer Service Near Me Walnut, CA
- – Pop Up Camper Repair Near Me Walnut, CA
- – OCRV Center
Latest Posts
Rv Paint Job Mira Loma
Rv Wall Repair Diamond Bar
Health Insurance Plans For Students Rancho Santa Margarita
More
Latest Posts
Rv Paint Job Mira Loma
Rv Wall Repair Diamond Bar
Health Insurance Plans For Students Rancho Santa Margarita